

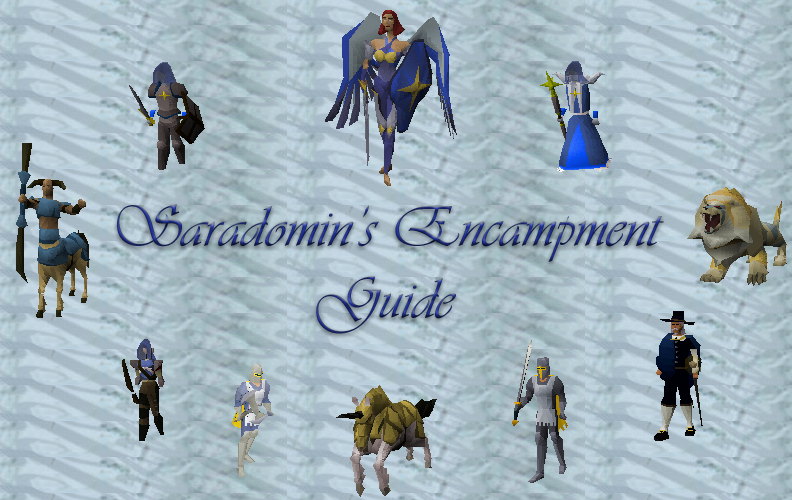
Introduction
This is my guide on Zilyana, the Saradomin God Wars Dungeon boss. She is my favorite boss, and arguably one of the most difficult bosses to kill. What I love most about The Saradomin boss is, unlike all the other GWD bosses, there are many different methods to use at Zilyana. Some are better then others, but all are fun and effective. Even now, nearly 5 months after I started going to sara, I am still perfecting my methods, refining my invo. That's what I love about the entire thing; developing the methods/gear/invos and perfecting them to a forumla lol Requiring level 70 agility and decent range, melee, prayer, and hp levels depending on the method used. Her melee attack hits mid 20s and is as fast as darts. Her mage attack can hit double, like a dds, if not prayed against. But her rewards are some of the best in all of God Wars Dungeon.
Sections
1) Introduction, History of Commander Zilyana, Killcount
2) Godsword Recommendations
3) Solo Methods
4) Duo Methods
5) Team Methods
6) A word on Drop Rates and The Drop System
7) General Tips, Credits, Testimonies
A brief History of Commander Zilyana, by Soma2035
28 August 2007 - God Wars Dungeon -
QUOTE ("Soma2035")
Release date of God Wars Dungeon and Link to the news post on Runescape home page. Almost instantly, players recognized Zilyana as the deadliest of the four bosses.
But it wasn't long before players found a winning strategy. Unlike other aggressive multi way area bosses, the bosses in God Wars Dungeon were focused. They would target someone, and not change unless they were struck several times while unable to reach their victim. 2 people could block the bosses path, while 2 more attacked the boss from a distance.
Well, this was widely used on all the bosses, and Jagex discovered and removed it fairly quickly. Her melee attack is so deadly she cannot be meleed head on. Her mage defense is so high ancients and magic is not feasible. A hit and run method is developed using either veracs or a god sword, or a rune crossbow.
Still not satisfied, some people developed the hit-and-duck method. Using the alcove in front of the door, they would step out, strike zil, and step back in, thereby nullifying her overwhelming speed. Even with this technique she caused massive amounts of damage, and many deaths. Soon enough, a very small group of people discovered a new method. They would lure Bree to the door alcove, trapped north of it an unable to hit anyone in the alcove. Growler would be trapped similarly, south of the alcove. Zilyana would be trapped in the same spot as Bree. Starlight would be lured into exactly the right position, and the killer would use chinchompas on starlight, splashing and hitting Zilyana. Because of the way Chinchompas functioned, it would utilize Starlight's defense only, making Zilyana very easy to kill.
Well, of course this trick didn't last very long either. The Bandos safespot was discovered, and when Jagex removed it, they decided also to remove the door alcove. Unknowingly, they put an end to this technique as well.
A few months later, a safe spot was found. Zilyana and star light could be lured onto a slanted corner and ranged; only taking hits from Bree the ranger. The group known to have found it concealed it for several months. However, after 3 months, several more discovered it and were more willing to spread it. Within a week, the amount of people using it rose from under 10 to several dozen, and pictures were circulated. The safespot was finally revealed to the public, and Jagex modified the safe spot. Zilyana can still get stuck on the walls, but after 2-3 hits she walks out. This is where the solo method and duo method come into play.
Apparently, Jagex had a hard time removing the slanted corner. The unusual AI was a temporary fix, and several weeks later, Jagex removed the wall for good, modifying the wall so not to mess up the rest of the dungeon, and removing any safe spots for good. That leaves us back on square one, with the hit and run method.
The Kill Count
This kill count is pretty straight forward. Kill 40 Saradomin NPCs, preferably ones in combat. If using lootshare, it is a good idea to use it for the kill count. Lootshare splits the kill count evenly, this helps ensure everyone finishes at the same time. There are 3 three levels to the Saradomin camp, if one level is busy try the next.
Far too often I hear "I don't have 83 slayer, I can't go to sara GWD" or "I don't have 83 slayer, the killcount will take so long." This is a huge mistake, 83 slayer makes little to no difference, speeding up the kc by maybe 3-4minutes.
If you are ranging the kill count, the melee NPCs can be blocked by things like Sara mages (some times at least) and by pretty much all the Zamorak NPCs in the area.
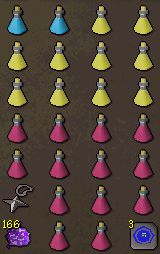
If you get a drop and want to keep it, like rune or d boots, you have two options. If you do not have a familiar, brew to max hp then sip a rest. Drop the brew and get the drop. Should you need to pick up another drop, drop the restore next.
The second option is for players using a familiar (all players should have some kind of familiar, to be honest). Drop a potion, then get the drop. Continue picking up and re-dropping the potion every minute or so, to stop it from dissappearing. Once you have 40 kill count and are ready to enter the boss room, drop the potion on the bottem level, summon the familiar, then pick up the potion again. THis way you lose no supplies and keep the drop from before.
You will always need a saradomin and a zamorak item for this kc. Good god items to use are-
Bracers
Sara/Zammy d'hide top and chaps
Holy and Unholy Symbols
God Capes and Treasure Trail God Capes
Stoles
God Swords
Godsword Recommendations
While the primary method to kill the Saradomin boss is with range, the Godswords can be very effective weapons when used correctly. Here, I will briefly explain how to use each Godsword in the most effective manner.
The ultimate Godsword for Saradomin GWD is without a doubt the Zamorak Godsword. This weapons special attack has the chance to freeze your opponent for 20 seconds. This is especially usefull at the Sara boss, as the main idea here is to avoid being meleed by the boss all together. A successful hit with this spec allows you and your team 20 seconds of free reign on Zilyana.
The best Godsword to use with the Zamorak godsword is the Armadyl Godsword. If one or more team members has a Zamorak Godsword, use the Armadyl Godsword spec after the Zamorak Godsword has frozen Zilyana.
The Bandos Godsword would be used the same way the Armadyl Godsword is used :P
Possibly the second best Godsword to use for Sara GWD is the Saradomin Godsword. This weapons special attack restores half the damage done to your hp and a quarter to your prayer. This spec is best used on minions, and with piety.
Solo Method
First, I want to give a warning to anyone looking to solo. When picking a world, always make sure it is not a lootshare world. Soloing in a lootshare world is asking to get crashed.
There is one effective way to solo Zilyana. It requires you to constantly run away from Zilyana, avoiding her melee, while ranging her.
Solo Running Method
With this method, you are continually running away from Zilyana to avoid her melee, while still shooting at her.
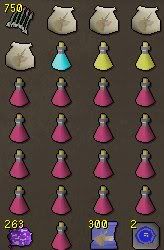
Setup
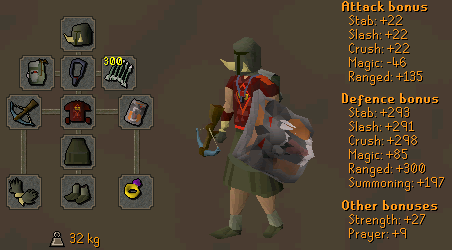
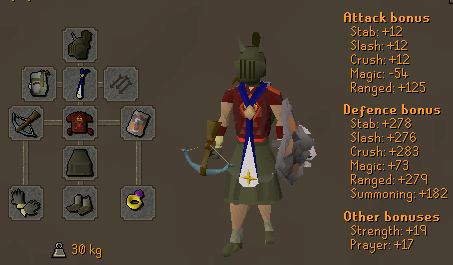
Torag or Verac helm is fine. Sara d hide top can be used as well, just take a zammy item to compensate.
Archer Ring > ROW > ROL
Df > Granite/Obby > Rune Kite
Barrows Gloves > Vambs > Rune Gloves
Invo With Unicorn Stallion
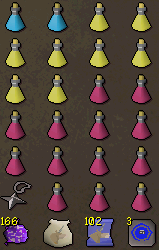
Invo With Spirit Terrorbird
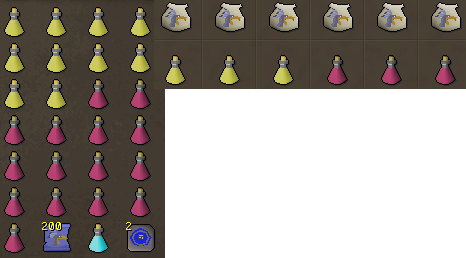
You will need 3 extra pouches for-
One for summoning a new familiar at the boss door.
One for when the first runs out in the boss room.
One for extra, incase one of the terrorbirds die.
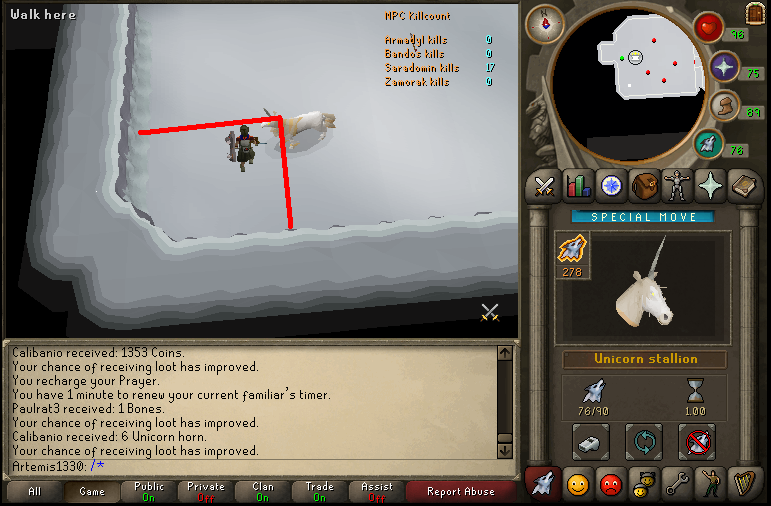
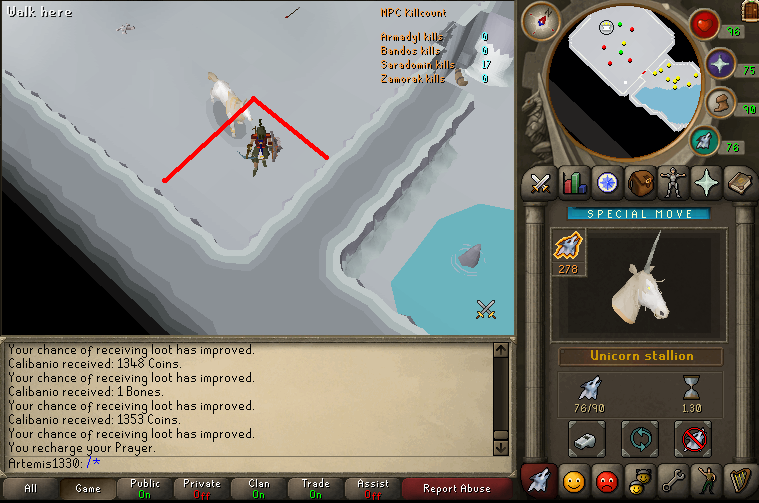
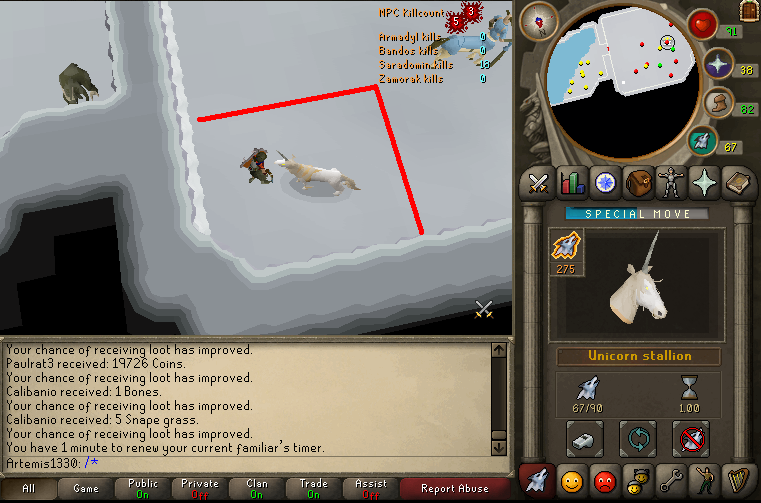
While you can take a familiar down the entrance rope into GWD, you can not take a familiar past the two ropes into the Saradomin area. To work around this, get the kill count in the upper area. Once you have the killcount, dismiss the terrorbird at the first rope. Run to the boss room door and drop 12 items. Run back to where you dismissed the terrorbird and pick up the items it dropped. Run back to the boss door and summon the terrorbird and fill up it's invo. To see this best, watch the short video below.
How to take a Beast of Burden to Zilyana
Invo With no Familiar
You can take 3-4 sharks/tuna tators/manta rays if you find yourself sipping brews before you need to sip restores.
The Battle
The whole idea here is to stay out of Zilyana's melee range. Once you have the killcount, head to the boss room entrance. Pot up to full Hp and prayer, and range pot.
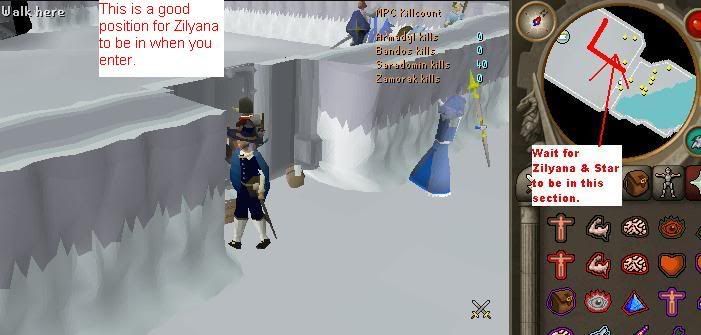
When Zilyana is near that spot, put on protection from magic prayer, eagle eye, and enter. Start shooting at Zilyana, running away after every 1-2 shots. If you are new to this, you may want to start with longrange, swapping to rapid when you get better.
Continually run around the room, following the walls, while turning back and shooting at her when you can. Make sure you watch your run energy very closely, walking away from Zilyana is a death wish. Be conservative with your range pots, try to sip just one or two times per kill.
When Zilyana is dead, run to the north wall. Standing on the north wall will get Starlight to stop attacking-
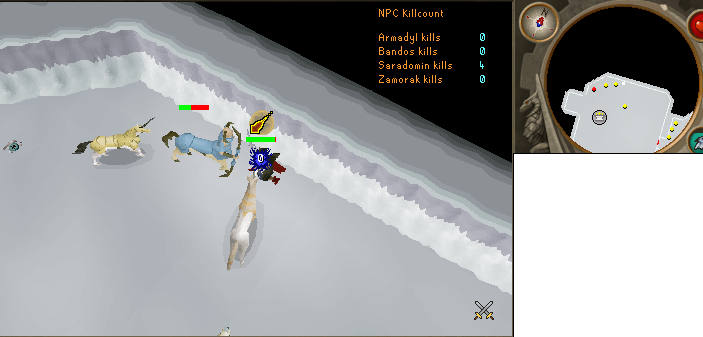
Kill Bree from here, then Starlight, then Growler if you have time.
Solo Running Video
Solo Zilyana Run Method
Duo Method
I do not include a duo melee method in this guide. I have not found anyway way to duo melee sara that can compete with duo range. Duo range allows for over twice the kills per trip.
Duo range Range gets an average of 30-40 kills a trip for expierenced players.
I recommend 85+ range, 75-80+ def, 60+ prayer, 75+ Hitpoints.
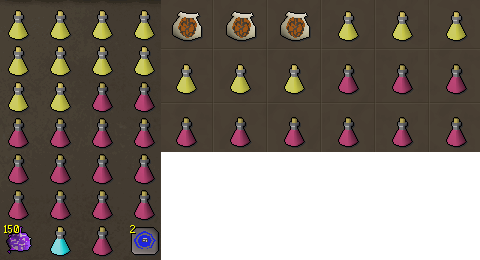
Duo Range Setup
This setup is very similar to the solo setup. Prayer bonus is very important here.
Verac Helm > Torag
Stole > Fury > Glory
Ranger Boots > Snake Skin > Dragon Boots > Rune
Archer Ring > ROL
Df > Granite/Obby/Crystal/Dragon Square
Do not take a ring of wealth in any situation you will be using lootshare. According to Jagex, the ring of wealth does not effect lootshare drops.
QUOTE (Knowledge Base)
Does the ring of wealth work with LootShare?
No, the ring of wealth does not improve your chances of getting a good drop while you are LootSharing. The ring only works when you are fighting by yourself.
No, the ring of wealth does not improve your chances of getting a good drop while you are LootSharing. The ring only works when you are fighting by yourself.
Link- http://www.runescape.com/kbase.....cle_id=636
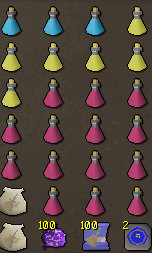
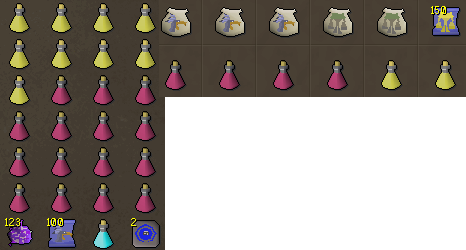
Duo Range Invos
I only recommend two familiars for duo; the level 88 summoning Unicorn Stallin and the Level 52 summoning Spirit Terrorbird. If I had to choose between the two, I'd pick the Spirit Terrorbird. The Beast of Burden effect allows you to take 12 more items, and the scrolls restore energy for virtually no cost.
Invo No Familiar

Invo With Stallion
In order to get by with no summoning pots, when your summoning points hit about 12, dismiss the familiar and summon a new one. You now have that familiar for its full length of time (you don't need summoning points to have a familiar out, only to summon it).
Invo With Spirit Terrorbird
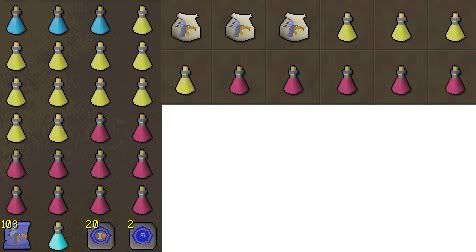
While you can take a familiar down the entrance rope into GWD, you can not take a familiar past the two ropes into the Saradomin area. To work around this, get the kill count in the upper area. Once both you and your partner have the killcount, dismiss the terrorbird at the first rope. Run to the boss room door and drop 12 items. Run back to where you dismissed the terrorbird and pick up the items it dropped. Run back to the boss door and summon the terrorbird and fill up it's invo. To see this best, watch the short video below.
How to take a spirit terrorbird to Zilyana
In order to get by with no summoning pots, when your summoning points hit about 12, dismiss the familiar and summon a new one. You now have that familiar for its full length of time (you don't need summoning points to have a familiar out, only to summon it).
The Battle
This method uses range to avoid Zilyana's melee attacks. Combined with her AI for movement, it is a very effective method. In general it allows for about 30 kills a trip, up to 40 if you are expierenced.
Once you and your partner have the kill count, meet at the door and take a sip of your range pot and put on magic protection prayer. One person should enter first. This person will have Zilyana on them and should run in a square around the room, hugging the walls. The other partner enters and starts ranging Zilyana. When Zilyana stops focusing on the first partner, you will both have to range her, keeping her in the center of you both. If she starts to get close to you, take a few steps back and let her wander away. If you wait too long and she gets close enough to melee, run in a square around the room. When done right, she will stay in the center of you both, kind of wandering around.
If you have a Zamorak Godsword (highly recommended) use the spec at the start of each boss.
If you have a spirit terrorbird with you, you will have to summon a new one at least once during the trip. You should do this when Zilyana is dead. If you have to, dismiss your current one a minute or two early to make sure you have a source of energy for the boss.
When Zilyana dies, both of you should go to the north wall and range Bree. When hugging the north wall, Starlight will not attack you-
Range Bree, then Starlight, then Growler if you have time.
Duo Range Video
Three Man+ Team Method
There are two main ways to team Zilyana- Melee and Range.
Range is great option, and probably the better way to kill Zilyana. Zilyana's range defense is fairly low, and her AI for movement is in great favor for the ranger.
The big difference between the two methods is melee will get you faster kills per trip, while range will get you more kills per trip. So do you want to stay at Zilyana longer? Or do you want to kill her faster but less times a trip? It's up to you.
Team Range Method
I recommend 80+ range, 70+ def, 70+ Hitpoints, and 50+ prayer.
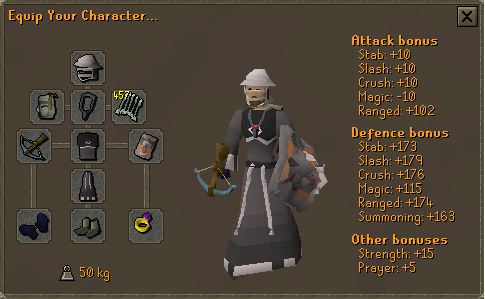
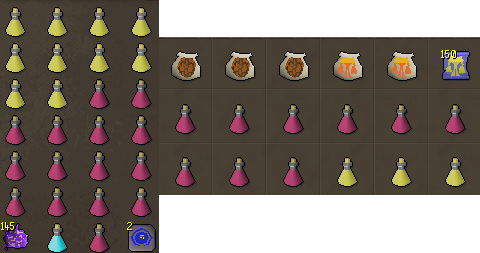
General Range Setup

God Dragon Hide > Karils > Black Dragon Hide
Verac Skirt > Chaps
Stole > Fury > Glory
Archer's Ring > Ring Of Life
Verac's Helm > Torag's Helm > Other Barrows > Neitiznot
Dragonfire Shield > Granite/Obby/Dragon Square/Crystal Shield > Rune Kite
Veracs Helm is best here, as you are trying to get the most out of your trip and need to keep prayer for as long as possible.
Do not take a ring of wealth in any situation you will be using lootshare. According to Jagex, the ring of wealth does not effect lootshare drops.
QUOTE (Knowledge Base)
Does the ring of wealth work with LootShare?
No, the ring of wealth does not improve your chances of getting a good drop while you are LootSharing. The ring only works when you are fighting by yourself.
No, the ring of wealth does not improve your chances of getting a good drop while you are LootSharing. The ring only works when you are fighting by yourself.
Link- http://www.runescape.com/kbase.....cle_id=636
You can also take guthans with range. Instead of verac helm and skirt, take guthans with the spear and plate in invo. Guthans is NOT necessary if you have the unicorn stallion familiar.
Void Setup
This is only for one or two players in a large team of 5+, otherwise you'll get owned with the low def of void, and the low prayer will drain fast.
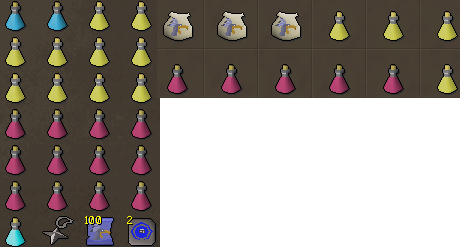
Team Ranger Invos
These invos will vary depending on a few factors such as def level, range level, GWD expierence, Sara boss expierence, etc. However these are good invos to start with and go from there.
I do not recommend taking fighter familiars for this method. Fighter familiars only fight other npc's if you are being attacked. Most of the time you will not be under attack and your fighter will simply follow you around. Furthermore, Beasts of Burden and Healers have a much larger effect.
Invo no Familiar
Range pots are optional here, if you are over level 90 range they really are not necessary.
If using guthans, include the spear and plate. Take 4-6 less brews. The amount of brews you take depends greatly on your expierence at sara.
Invo With Stallion
Beginner Invo-
Expierenced Invo-

Only go with no brews if you are very expierenced, take more if you are not sure or have not been before. Try to use less populated worlds for slower respawns. This will allow the spec for the familiar to regenerate between spawns.
Invo with Beast of Burdens
I will include every invo you can use with a beast of burden. Which one you should use depends on your summoning level.
While you can take a familiar down the entrance rope into GWD, you can not take a familiar past the two ropes into the Saradomin area. To work around this, get the kill count in the upper area. Once you and your team have the killcount, dismiss the Beast of Burden at the first rope. Run to the boss room door and drop the same amount of items the Beast of Burden was holding. Run back to where you dismissed the familiar and pick up the items it dropped. Run back to the boss door and summon the Familiar and fill up it's invo. To see this best, watch the short video below.
How to take a Beast of Burden to Zilyana GWD
War Tortoise Invos
Plain invo (level 67 sum)-
War Tortoise and Healing Titan (level 79 sum)-
War Tortoise and Bunyip (level 68 sum)-
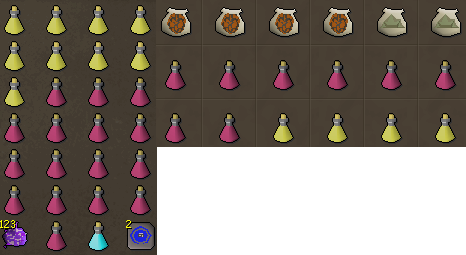
War Tortoise and Guthans (level 67 sum)-
Spirit Terrorbird Invos-
The great thing about spirit terrorbird is not only do you get the beast of burden effect, but you also get the virtually free energy restore.
Plain Invo (lvl 52 sum)-
Spirit Terrorbird and Bunyip (level 68 sum)-

Spirit Terrorbird and Healing Titans (level 79 sum)-
Spirit Terrorbird and Guthans (level 52 sum)-
Invo with Healing Titans
Healing Titans alone (level 79 sum)-
Healing Titans and Guthans (level 79 sum)-
In order to get buy with a low number of summoning pots, simply sip a pot when you need to summon a new familiar
It should be noted that range pots are optional here. When I do 3 man trips, I only have players take them if they are below 90 range. With 5+ players you don't need them at all if over 85 range.
The Fight
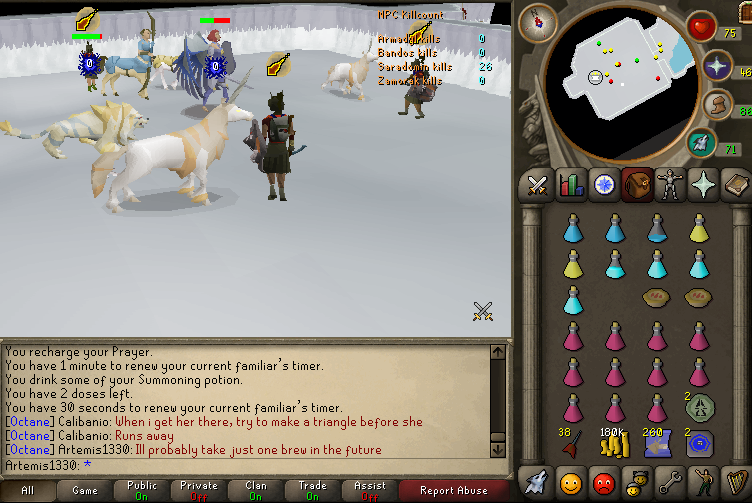
Well there are only one or two tricks here. The team should meet at the door, pot up, pray mage and eagle eye, and enter at the same time. As soon as you enter, it is very important to spread out. Keep your distance from Zilyana and stay spread out between your partners. The easiest way to keep Zilyana from focusing on a player is to stay nice and spread, making it hard for her to choose who to focus on. When you get good at it, you can kill Zilyana without her focusing on a single player, taking no damage from her.
With three people, it is best to create a triangle, with 4 a square, etc. the main goal is to have Zilyana in the center of all of you. When you do this she will spin around in the center, unable to choose a target.
Where to stand when Zilyana spawns
Getting it right-
Occasionally, Zilyana will walk towards a player. When this happens, quickly run in the other direction. She has not focused on you, but if you let her get close she will. You should understand what this means after seeing it a few times in game or in my videos.
If you do allow Zilyana to focus on you, run in the other direction. When you are running, hug the walls and run in a square around the room. Watch your hp, prayer, and run%. By the time you run along two walls she should no longer be focused on you.
If you have a Zamorak God Sword, use the spec when you first enter, then use it when Zilyana spawns each time after. If someone is taking a Zamorak Godsword and you have an Armadyl Godsword or Bandos Godsword, use the specs after Zilyana is frozen.
If using guthans, equip the plate and spear and heal on minis when Zilyana dies. If in a team of 5 or more, heal when ever needed.
If you are in a very large team of 6+, you may want to have the highest level ranger, or even the two highest rangers, wear void. Since you are staying for so long, d bow spec is not a bad idea either, guarenteed 16 every Zilyana kill. Dragon arrows would be recommended.
Once Zilyana has been killed, the person getting the last hit will have every minion on him/her. To fix this, that person should run to the very south wall, this gets Bree to focus on another player. Whoever Bree focuses on should then pray range. Meanwhile, the rest of the team should run to the north wall and stand on it. This wall gets Starlight to focus on no player. From here, range Bree, then Starlight, then kill Growler. This is very helpfull to save food. To better see this, watch the video below.
Range Team Videos
Team Range Zilyana
Team Range Zilyana 2
Team Melee Method
I recommend 80+ to all melee stats, 80+ Hitpoints, and 60+ prayer.
Melee Setups
Verac's Setup

Berserker or Warrior
Fury > Glory > Stole
Fire Cape > Skill Cape (T) > Skill Cape > Obby Cape
Dragon Boots > Rune Boots > Bandos Boots
God Sword Setup With Guthans
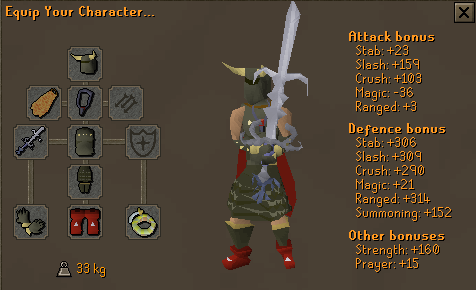
Any Godsword works here, sgs or ags is best for the specs.
Guthans > All
Warrior or Berserker
Fury > Glory > Stole
Dragon Boots > Bandos > Rune Boots
Do not take a ring of wealth in any situation you will be using lootshare. According to Jagex, the ring of wealth does not effect lootshare drops.
QUOTE (Knowledge Base)
Does the ring of wealth work with LootShare?
No, the ring of wealth does not improve your chances of getting a good drop while you are LootSharing. The ring only works when you are fighting by yourself.
No, the ring of wealth does not improve your chances of getting a good drop while you are LootSharing. The ring only works when you are fighting by yourself.
Link- http://www.runescape.com/kbase.....cle_id=636
Guthans is a must if you use a Godsword. If you don't have a Godsword, wear veracs.
Team Invos
I do not recommend taking fighter familiars for this method. Fighter familiars only fight other npc's if you are being attacked. Most of the time you will not be under attack and your fighter will simply follow you around. Furthermore, Beasts of Burden and Healers are much more effective.
Beasts of burden work excellent for team melee. If taking a beast of burden, load it with brews and super restores in a similar ratio of that in your invo. It is not necessary to take a Spirit Terrorbird, you will not use a great deal of run energy, so take a higher level Beast of Burden if you have the level.
The only healer I recommend is the Unicorn Stallion. I find that the War tortoise beast of burden is far more usefull then the bunyip healing effect.
Verac's Team Invo
With Beast of Burden-
With Stallion-
Guthan's Team Invo
With Beast of Burden-
For the Beast of Burden-
While you can take a familiar down the entrance rope into GWD, you can not take a familiar past the two ropes into the Saradomin area. To work around this, get the kill count in the upper area. Once you and your team have the killcount, dismiss the Beast of Burden at the first rope. Run to the boss room door and drop the same amount of items the Beast of Burden was holding. Run back to where you dismissed the familiar and pick up the items it dropped. Run back to the boss door and summon the Familiar and fill up it's invo. To see this best, watch the short video below.
How to take a Beast of Burden to Zilyana
In order to use just one or two summoning pots, when your familiars time runs out simply take a sip of summoning potion and then summon a new familiar.
The Battle
This method uses a "hit and run" technique. If Zilyana is focused on you, run away from her, hugging the walls around the foom. Meanwhile, the rest of the team continues to melee her. Once she swaps and focuses on another player, that player then runs.
Once everyone has the killcount, meet up at the door. Pot up, turn on mage protection prayer and piety. The player that enters first will have Zilyana focused on them, and should start running. The rest of the team enters right after and starts to melee Zilyana. Be prepared to run as soon as she changes focus to another team member, standing and letting her melee you is a fast death.
Keep an eye on your familiar as well, when it runs out it will drop all items it is holding. Make sure you summon a new familiar and load it before the items dissappear.
When Zilyana dies, the person getting the last hit will have all of the minions on them. This person should run all the way to the south and north walls. This wil get Bree and Starlight off them and on another player. Those players should pray melee or range accordingly.
If using guthans, take it out at any time and heal on minis.
Once all minions are dead, each team member should stand along the south wall. Once Zilyana spawns, flip on your prayers and start it all over.


 The festive season is upon us, and to celebrate we’re presenting you with the result of your Guaranteed Content Christmas poll, in the form of this years’ Christmas event. We’ve also got an appropriately wintery quest for you in Myths of the White Lands. We hope you have lots of fun, and enjoy your Christmas adventures!


