

Monday, December 28, 2009
Been So busy
Sorry for the lack of updates, but I've been extremely busy with school, work, and the family. I shall be updating soon soo keep looking out. I'm coming up with updated Boss guides, a Barrows Guide, Some Skill guides, and some other random guides. I also found a pretty cool website you should check out. It's not the greatest but it's just starting out. Gamewisdom Features Xbox360 Cheats, Gaming news, trailers,screenshots, and reviews. Anyways Happy scaping and keep comin over to look for new guides.. See ya
Monday, October 26, 2009
Runescape Halloween 2009 Event Guide
I'm not a big fan of the Holiday events and this is one of the worse I've seen yet. Plus the Queen spider is a racist:

Requirements: Nothing
Rewards: A Cape made of Spider Webs (lame)
and Eek The Spider (bah)

Guide:
1.) Teleport to Falador and go out the southern entrance and keep going south until you see the portal. Enter It.
2.) Talk to the Grim Reaper in the center of the main room and he will tell you he has a spider in his tub.
3.) Find the stairs and go up them and then go talk to the spider in the tub.
4.) The spider will tell you the Queen Spider sent him there.
5.) Go talk to the Grim Reaper, He will open a portal to the Queen spider's world.
6.) You will enter the portal and be taken to a sort of spider maze. Here Everyones path is different. It will help if you keep a map as you try to get through the maze. Because if you fail you will be brought back to the beginning
7.) Once you reach the staircase you will be brought to a different part of the maze.. This i don't think you can fail so just keep exploring until you get to another ladder.
8.) Here you will find the Spider Herald. Say death sent you and he will send you upstairs to talk to the queen.
9.) Talk to the queen and she will give you Eek The spider to Help you Web up the Grim Reapers House.
10.) Head back to the grim reaper and speak to him.
11.) Now go room by room webbing everything up.
12.) in one room y ou will encounter a skeleton dog. When you click on him try to entertain him. Then after entertaining him show Eek The spider to him and then you should be able to web the room.
13.) After webbing all the rooms speak to the Grim reaper. Then enter the portal and you will be sent back to the queens room. Speak to the queen she will give you the cloak and then Eek will say he wants to go with you. Congrats you finnished another lame Event!
Requirements: Nothing
Rewards: A Cape made of Spider Webs (lame)
and Eek The Spider (bah)
Guide:
1.) Teleport to Falador and go out the southern entrance and keep going south until you see the portal. Enter It.
2.) Talk to the Grim Reaper in the center of the main room and he will tell you he has a spider in his tub.
3.) Find the stairs and go up them and then go talk to the spider in the tub.
4.) The spider will tell you the Queen Spider sent him there.
5.) Go talk to the Grim Reaper, He will open a portal to the Queen spider's world.
6.) You will enter the portal and be taken to a sort of spider maze. Here Everyones path is different. It will help if you keep a map as you try to get through the maze. Because if you fail you will be brought back to the beginning
7.) Once you reach the staircase you will be brought to a different part of the maze.. This i don't think you can fail so just keep exploring until you get to another ladder.
8.) Here you will find the Spider Herald. Say death sent you and he will send you upstairs to talk to the queen.
9.) Talk to the queen and she will give you Eek The spider to Help you Web up the Grim Reapers House.
10.) Head back to the grim reaper and speak to him.
11.) Now go room by room webbing everything up.
12.) in one room y ou will encounter a skeleton dog. When you click on him try to entertain him. Then after entertaining him show Eek The spider to him and then you should be able to web the room.
13.) After webbing all the rooms speak to the Grim reaper. Then enter the portal and you will be sent back to the queens room. Speak to the queen she will give you the cloak and then Eek will say he wants to go with you. Congrats you finnished another lame Event!
Friday, September 4, 2009
Hello
Sorry for the lack of updates, I've been really busy plus I'm about to re-locate this to a better site, with better guides and organization.
Monday, August 10, 2009
Fur 'N' Seek Quest Guide
Fur 'n' Seek
Difficulty Level: Medium
Start Location: Talk to the Odd Old Man near the Limestone Mine west of Paterdomus.
Required:
Quests: Rag and Bone Man
Skills: 25 Slayer and a combat of around 50
Items: Tinderbox, 8 Logs, 9 Bags of Salt, Mirror Shield
Suggested:
Items: Antipoison Potion, Varrock Teleport/ Kharyrll Teleport/ Digsite Teleport, Camelot Teleport/ Enchanted Lyre Teleport
1. Speak to the Odd Old Man by teleporting to Varrock and walking towards Paterdomus, use an enchanted Ruby Necklace to teleport to the Digsite or a Kharyrll teleport to teleport to Canifis. Agree to helping the Odd Old Man out.
2. The Odd Old Man tells you that there is a Fremminik fur display he wants to have filled and he wants to include these furs:
3. Now it is time to collect all of these items. Luckily for you they are all around the Rellekka area!

4. Once you have collected the nine hides, you must use a bag of salt on all the items to received salted items and a rock crab carcass.
5. Now that you have all the salted/ scrubbed pelts, furs and carcasses you must tan them. Bring your items to the rag and bone man. Click "Adds-Logs" on the fire pit and then "Stretch-Skin" on the massive ribs. Then light the fire on with your tinderbox.
6. Once you do this with all of the furs (minus the Rock Crab Carcass), give them to the Odd Old Man and he will tell you about the extension quest and give you your reward.
Quest Points: 2
Reward: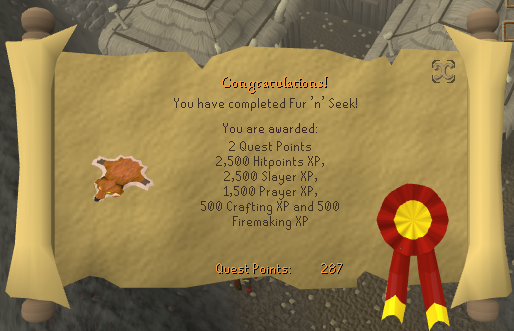
Tips, tricks & notes:
Difficulty Level: Medium
Start Location: Talk to the Odd Old Man near the Limestone Mine west of Paterdomus.
Required:
Quests: Rag and Bone Man
Skills: 25 Slayer and a combat of around 50
Items: Tinderbox, 8 Logs, 9 Bags of Salt, Mirror Shield
Suggested:
Items: Antipoison Potion, Varrock Teleport/ Kharyrll Teleport/ Digsite Teleport, Camelot Teleport/ Enchanted Lyre Teleport
1. Speak to the Odd Old Man by teleporting to Varrock and walking towards Paterdomus, use an enchanted Ruby Necklace to teleport to the Digsite or a Kharyrll teleport to teleport to Canifis. Agree to helping the Odd Old Man out.
2. The Odd Old Man tells you that there is a Fremminik fur display he wants to have filled and he wants to include these furs:
- Adult Black Unicorn - North of the Swaying Tree .
- Adult White Unicorn - West of the Golden Apple tree, above the Log Balance.
- Hobgoblin - Inside of Relekka, in the northern area near the docks.
- Fox - Along the river near the bridge to Rellekka.
- Fenris Wolf - Near the bridge to Rellekka, just west of the path.
- Adult Grizzly Bear - Along the river near the bridge to Relekka.
- Cockatrice - Requires Mirror Shield - Slayer Dungeon
- Cave Crawler - May poison - Slayer Dungeon
- Stuffed Rock Crab - Just south of the Snowy Hunter Grounds.
3. Now it is time to collect all of these items. Luckily for you they are all around the Rellekka area!
4. Once you have collected the nine hides, you must use a bag of salt on all the items to received salted items and a rock crab carcass.
5. Now that you have all the salted/ scrubbed pelts, furs and carcasses you must tan them. Bring your items to the rag and bone man. Click "Adds-Logs" on the fire pit and then "Stretch-Skin" on the massive ribs. Then light the fire on with your tinderbox.
6. Once you do this with all of the furs (minus the Rock Crab Carcass), give them to the Odd Old Man and he will tell you about the extension quest and give you your reward.
Quest Points: 2
Reward:
- 2,500 Hitpoints Experience
- 2,500 Slayer Experience
- 1,500 Prayer Experience
- 500 Crafting Experience
- 500 Firemaking Experience
Tips, tricks & notes:
- If you can use a Terrorbird, it will speed things up as it may hold items for you and can restore you energy 33% by using just one scroll!
- You may kills any of these animals in Gieilinor, not just the ones around Relekka (i.e., a white unicorn south of Varrock or black unicorns in the Wilderness north of Edgeville).
Fur 'n' Seek Guide Coming Soon!

The Odd Old Man is again in need of a hand, but this time it’s not all going to be about bones. Apparently, he has new needs that will require adventurers to seek the hides, pelts and skins of creatures commonly found in the Fremennik Province.
Players will be able to allow the Odd Old Man to take his plan fur-ther. More experienced players will then be able to help him the rest of the way, getting extra rewards and uncovering the truth behind one of RuneScape’s most guarded secrets – just what is in that mumbling bonesack?
Mod Maylea
RuneScape Content Developer
Summary:
| Where to start Fur 'n' Seek: Speak to the Odd Old Man near his shack between Varrock and Paterdomus.Requirements to complete Fur 'n' Seek: 25 Slayer An advised combat level of 50 Must have completed Rag and Bone Man (the quest, not the wish list) |
In other news...
For those of you who might have missed it last week, we reintroduced some features to the Grand Exchange section of the website, including a 30-day average line to the graphs.
Berserker ring can now be imbued by Mobilising Armies officers, just like the other Fremennik rings.
Sunday, August 2, 2009
King Black Dragon Guide

TEAM KILLING
Part 1 - General Information
Part 2 - Specializations
Part 3 - Equipment
Part 3.1 - Meléers with One-Handed Weapons
Part 3.2 - Meléers with Two-Handed Weapons
Part 3.3 - Rangers with One-Handed Bows
Part 3.4 - Rangers with Two-Handed Bows
Part 4 - How To Get There
Part 5 - Other
Part 5.1 - If a Revenant Ghost turns up!
Part 5.1.1 - Catching Sight of a Revenant Ghost
Part 5.1.2 - If You Get Attacked By a Revenant Ghost
Part 5.1.3 - If a Team Mate Gets Attacked By a Revenant Ghost
Part 5.2 - Something missing?
Part 6 - FAQ
Part 7 - Credits
Part 1 - General Information
The King Black Dragon is a dangerous trip. Many people of prowess have been slain by this beast. It's poison, ice and fire-y breaths are what make it the king of all black dragons, the 50+ hits are the ones you must look out for.

Part 2 - Specializations
Location: King Black Dragon Lair ~ The entrance is located in level 38 wilderness.
Combat: 276
Hitpoints: 257
Attacks: Melee, Magic and DragonBreath.
Classification: Animal/Dragon.
Major Drops: This beast drops the formidable Draconic Visage. This sells for huge profits! If you get it towards the end of the trip with less of you, well, cha-ching, free monies. The original dragon item, the Dragon Med Helm, is also dropped by this monster, the first to do so, these are no longer shared as they are worth little. It would be silly to have 20k each!
Special Notes: He has three heads. These hit in turn but each has a different ability. These are:
Fire; this hits very hard and has a chance to lower your stats. If you are wearing a Dragonfire Shield, you will absorb this into your shield.
Ice; this freezes you to the spot for around five seconds, and hits medium damage. On occasions it stuns you, reducing your stats slightly.
Toxic; this heavily poisons you. The poison starts by hitting 8s and slowly decreases (Like Regular Poison). This hits low to medium damage.
Part 3 - Equipment
Part 3.1 - Meléers with One-Handed Weapons

Best to Worst:
Code:
H: Helm of Neitiznot / Berserker Helm / Proselyte Helm / Rune Full Helm /
B: Karil's Body / Black D'hide Top / Proselyte Body / Rune Platebody / Initiate Body
L: Black D'hide Legs / Proselyte Legs / Rune Legs / Initiate /
G: Barrows gloves / Rune Gloves / Adamant Gloves / Black Vambraces /
B: Dragon Boots / Rune Boots / Climbing Boots / /
S: DragonFire Shield / AntiFire Shield / / /
MW: Whip / Dragon Scimitar / Dragon Mace / Dragon Battleaxe /
W2: Dragon Dagger (p++) / Dragon Mace / Dragon Halberd* / Dragon Battleaxe /
R: Ring of Life / Beserker Ring / Ring of Duelling / /
N: Amulet of Fury / Amulet of Strength / Amulet of Glory / /
C: (Trimmed) Skill Cape / Obsidian Cape / Ava's Accumulator / Any Other Cape /
* Whilst using a Dragon Halberd, your DragonFire Shield will UN-EQUIP. Make sure you use your specials (It will double hit the KBD) and re-equip the shield as fast as possible! You must make sure you also put mage prayer on whilst you are using the dragon halberd; this will slightly combat the fire breath if you get hit. Also, make sure your HP is above 60 at all times whilst using a dragon halberd.
Tips
- If you are on a slayer task, you can wear a black mask! The extra damage will mean your entire group takes less damage.
- As a meléer, you will be the common member of the group as only one or two people range. If Loot Share is not activated, you will frequently be beaten to the drop because of other meléers unleashing special attacks from their weapon onto the King Black Dragon.
- Pot up outside the lair with your super set and super anti-poison and enter with mage prayer active, once you have killed it once, you can remove prayer and never use it again because of the armor you will be using. Pot up every time one of your combat levels drops back to what it was originally.
- If the KBD spawns in a different place to normal, get out from underneath as soon as you can to make the KBD stay where it should be so everyone does not go out of place.
- Unleash specials when you have 50% (or 60% if you are using a dragon halberd) energy in your bar not 100%. You will hit just as hard as if you were using 4 specials because you frequently hit 0-0 using specials, plus, you use it more often in effect.
- If you want, use chivalry, piety, or a group of prayers to help you if you are running out of food and want to use up your remaining prayer potions. If you wish to use it constantly, bring at least 3 prayer potions, maybe 4.

Best to Worst:
Code:
G: Barrows gloves / Rune Gloves / Adamant Gloves / Black Vambraces /
B: Dragon Boots / Rune Boots / Climbing Boots / /
S: None** / / / /
W2: None* / / / /
R: Ring of Life / Beserker Ring / Ring of Duelling / /
N: Amulet of Fury / Amulet of Strength / Amulet of Glory / /
C: (Trimmed) Skill Cape / Obsidian Cape / Ava's Accumulator / Any Other Cape /
* You might want to bring along a dragon halberd or another dragon item to use special attacks on the King Black Dragon if your weapon has no special.
** You will have a Two-Handed Weapon.
As you can see I have not included the Weapon, Helmet, Body or Leg slots. This is because you now have a massive choice on what to pick!
The Godsword set allows you to mix and match what you can afford, the ones at the top are the best, going down to the worst at the bottom.
The Barrows set, however, you must use all of the ones on a row, so you cannot mix and match, although, you should be able to have worked out why for yourselves.
Godsword Set
Code:
Sara Godsword / Karil's Top / Black D'hide Legs / Helm of Neitiznot
Armadyl Godsword / Black D'hide Top / Proselyte Legs / Beserker Helm
Bandos Godsword / Proselyte Body / Initiate Legs / Proselyte Helm
Zamorak Godsword / Initiate Body / Granite Legs / Initiate Helm
Dragon Halberd / Granite Body / Dragon Platelegs / Dragon Full Helm
Dragon Two-Hand / Rune Platebody / Rune Platelegs / Rune Full Helm
Barrows Sets
Code:
Dharok's Axe / Dharok's Body / Dharok's Legs / Dharok's Helm
Verac's Flail / Verac's Brassard / Verac's Legs / Verac's Helm
Guthan's Spear / Guthan's Body / Guthan's Legs / Guthan's Helm
Verac's Flail / Verac's Brassard / Verac's Legs / Verac's Helm
Guthan's Spear / Guthan's Body / Guthan's Legs / Guthan's Helm
Godsword Special Attacks
- Armadyl Godsword ~ The Judgment ~ Inflicts 25% more damage
Bandos Godsword ~ Warstrike ~ Attack does 10% more damage and drains your opponent's combat statistics by the amount of damage inflicted. Statistics are drained in the following order: Defence, Strength, Prayer, Attack, Magic, Ranged.
Saradomin Godsword ~ Healing Blade ~ Inflicts normal damage, but restores half of the damage to your Hitpoints and a quarter to your Prayer. You will receive a minimum of 10 Hitpoints and 5 Prayer.
Zamorak Godsword ~ Ice Cleave ~ Freezes your opponent for 20 seconds.
- This is EXTREMELY dangerous. It is best to have knowledge of the King Black Dragon before you attempt this.
- As you have a Two-Handed Weapon, you have no AntiFire/DragonFire shield! This means that you MUST have mage prayer on the whole time the King Black Dragon is spawned.
- Pot up whenever your attack, strength OR defense levels return to it's permanent level.
- Always watch your health very carefully, you can get hit big because you have no AntiFire/DragonFire shield.
- Regularly check your Prayer Points, it drops very quickly if you do not pay attention, this means no prayer, no shield; you can get hit up to 65.
- If you are on a slayer task, you can wear a black mask! The extra damage will mean your entire group takes less damage.
- This is the best way to kill the King Black Dragon solo. But remember, you only have 2-5 minutes to return to your gravestone if you do attempt this!
Best to Worst:
Code:
H: Archer Helm / Robin Hood Hat / God Coif / Coif / Skill Cape Hood
B: Karil's Top / Black D'hide Body / Prosylete Body / Initiate Body / Red D'hide Body
L: Black D'hide Legs / Prosylete Legs / Dragon Legs / Initiate Legs / Red D'hide Legs
G: Barrows Gloves / Rune Gloves / Black Vambraces / /
B: Ranger Boots / Snakeskin Boots / Dragon Boots / Rune Boots /
S: DragonFire Shield / AntiFire Shield / / /
MW: Rune Crossbow ** / Bone Crossbow º / Rune Crossbow ºº / /
W2: None* / / / /
R: Archer's Ring / Ring of Life / Ring of Wealth / /
N: God Stole / Amulet of Fury / Amulet of Accuracy / Amulet of Glory /
C: Ava's Accumulator / (Trimmed) Skill Cape / Obsidian Cape / Any other Cape /
* You will not need a second weapon as both the bone crossbow and rune crossbow (with enchanted bolts) will have special attacks.
** With (adamant) ruby bolts (e). These will hit like normal adamant bolts but the special will sometimes hit, causing 20% of the monsters hp to hit. On the King Black Dragon this can be up to 48.
º Bone Bolts. Special reduces defense of the monster.
ºº With any un-enchanted bolts. Try to get them over Mithril if you can.
Tips
- As a ranger, you would expect to try and sit as far from the King Black Dragon as possible, but you want to get into melée range. This is so it uses more melée attacks and less breaths so you use less potions. This is because it's melee attack is weaker then it's magic attack.
- Pot up outside the lair with your ranger potion and super anti poison and enter with mage prayer active, once you have killed it once, you can remove prayer and never use it again because of the armor you will be using. Pot up every time one of your combat levels drops back to what it was originally.
- If the KBD spawns in a different place to normal and you are under it, get out from underneath as soon as you can to make the KBD stay where it should be so everyone does not go out of place.
- If you have a bone crossbow, the special attack uses 80% of the bar. Only use it straight after the King Black Dragon has spawned because of the defense lowering ability.
- If you want, use hawk eye to help you if you are running out of food and want to use up your remaining prayer potions. If you wish to use it constantly, bring at least 3 prayer potions, maybe 4.
- If you are using Ruby Bolts (e), you will notice you have no special bar. This will automatically hit at a random time, dealing 20% of the hitpoints of the monster.

Best to Worst:
Code:
H: Archer Helm / Robin Hood Hat / God Coif / Coif / Skill Cape Hood
B: Karil's Top / Black D'hide Body / Prosylete Body / Initiate Body / Red D'hide Body
L: Black D'hide Legs / Prosylete Legs / Dragon Legs / Initiate Legs / Red D'hide Legs
G: Barrows Gloves / Rune Gloves / Black Vambraces / /
B: Ranger Boots / Snakeskin Boots / Dragon Boots / Rune Boots /
S: None** / / / /
MW: Dark Bow / Crystal Bow / Seercull Bow / Magic Shortbow /
W2: None* / / / /
R: Archer's Ring / Ring of Life / Ring of Wealth / /
N: God Stole / Amulet of Fury / Amulet of Accuracy / Amulet of Glory /
C: Ava's Accumulator / (Trimmed) Skill Cape / Obsidian Cape / Any other Cape /
* Sometimes, rangers using bows without a special will bring along a dragon halberd or another dragon item to use special attacks on the King Black Dragon (More in Tips).
** You will have a Two-Handed Bow.
Tips
- As you have a Two-Handed Bow, you have no AntiFire/DragonFire shield! This means that you MUST have mage prayer on the whole time the King Black Dragon is spawned.
- If you can, stay within melée range. Seems odd does it not? The key to this is, as you have mage prayer on, it will want to melée you, but, you have good defense against his melée armour, so you get hit less, because his mage attack is stronger even with your huge mage defense!
- Keep your range level at least 5 above your permanent level at all times.
- Always watch your health very carefully, you can get hit big because you have no AntiFire/DragonFire shield.
- Regularly check your Prayer Points, it drops very quickly if you do not pay attention, this means no prayer, no shield; you can get hit up to 65.
This is generally done in three different ways, although, there is a slightly easier one for those going alone to join halfway through a trip.
Fixed Wilderness Teleports - The easiest way to go, sometimes takes a while to get to the Level 44 one though. If you get to the level 50 one, teleport fast, revenants and the Chaos Elemental have parties here. You can lure the revenant into and out of teleports too so you can escape. If you get split from the group, just keep trying to get to level 44.
Walking - Very easy. Very likely to meet revenants however, this is the traditional SoDB route.
Ice Plateau Group Lunar Teleport - If one person is on Lunars they can use this. Sometimes not everyone will have Accept Aid On, this should be told though. Not much chance of meeting a revenant.
Ardougne Teleport Lever - Pass Chaos Elemental. Pass 3 revenant paths. It screams 'Kill Me', although it is fast.


Generally, you meet at Edgeville, go to the monastery, get prayer points, and go to the ditch.
Make sure your group leader has specified a back-up world (make sure it has Loot Share if you are using it) in case someone catches sight of Revenant Ghosts or there is a Revenant Ghost.
Tell everyone to turn Loot Share on at this time if you are using it and make sure everyone is now talking solely in Clan Chat.
Once ready, follow your group leader into the wilderness. Some rules on 'If A Revenant Ghost Turns Up' are after the 'How To Get There' section of this guide. SoDB's main method of traveling is by walking directly. Please refer to 'How To Get There' for more information.
On arrival of the gate, just before the greater demons behind the gate, your leader will tell you to use your potions. If you are a ranger, these would be Range Potion and Super Anti Poison. If you are a meléer, these would be your Super Set and Super Anti Poison. You should then proceed to put Mage Prayer on and enter.
You will go down a ladder within the Greater Demons into a small room, surrounded by walls and lava and poison spiders. If you did not drink any Anti-Poison, you will be poisoned, if you did drink some, good. There is a small lever which you need to pull - this takes you straight to the KBD lair.

You should have mage prayer activated and have used the necessary potions, if you have not, do so now. Kill the King Black Dragon as quickly as possible, if you are recording loot, record it.
Get into a position around the King Black Dragon, as shown. Use landmarks (Such as the Sapphire spawn and the Gold Ring spawn) to find out where to stand.

You are now at the King Black Dragon with your group and should be killing it with ease!
Part 5 - Other
Part 5.1 - If a Revenant Ghost turns up!
Part 5.1.1 - Catching Sight of a Revenant Ghost
Tell your team to put range prayer on, keep walking but just avoid it.
Part 5.1.2 - If You Get Attacked By a Revenant Ghost
Turn on RANGE prayer instantly.
Lure them behind a rock and just run away. They are not very smart.
If you have been Tele-Blocked, continue as above but stay with the poison spiders until it wears off.
Part 5.1.3 - If a Team Mate Gets Attacked By a Revenant Ghost
Tell them to turn on RANGE prayer if they already haven't. They freeze with their range attacks.
Tell the entire team to turn run ON and get to the KBD lair as soon as you can.
Part 5.2 - Something missing?
If there is anything missing to go towards this guide, all you have to do is simply message me with what is missing, and what needs to go into it. I will add it into the appropriate section of the guide (or even make a new one!) and add you into the credits.
Part 6 - FAQ
Q: What would be the best choice of armor if I'm new to KBD?
A: The best thing to start off with is a one-handed weapon, as you can use the dragon fire shield. It is the safest way, and the least complicated. Alternatively, if you are a ranger, you can start with a 1-handed bow. It is also very safe. Ranging with a 2-handed bow is not hard, but mistakes can be costly. Meleeing with a 2-handed weapon should only be done if you are very experienced, and if your team knows what to do in that situation.
Q: What level should I be before I go to the KBD?
A: Preferably, you should be level 60+ with a good team. You can really go at any level as long you have any gear listed, have over 30 hitpoints, and have started Dragon Slayer.
Q: How many people is too many to take?
A: 1 more then the server can hold!
Q: How come the King Black Dragon isn't the toughest dragon, if he is the king?
A: He is the King of Black Dragons. If you have a point against that, something exploded somewhere near the Barbarian Outpost so now there is a whirlpool and some Mithril Dragons were a part of this explosion and they are very strong indeed because they got created from a massive explosion. I like the word explosion...
Q: What level should I be before I start soloing?
A: Ok, if you want to solo melée, you will need to be 100+ at the bare minimum with buckets of experience. If you are a ranger, you will need at least 80 range and 75 defence and to know how the KBD 'works'. But remember, this guide does not give you tips for soloing, so please do not use it if you plan to solo!
Q: How is it possible that this guide is so awesome?!?!
A: Because I am awesome?!?!
Part 7 - Credits
Writer: Ca2theone
Quality assurance: Fredz, Superson & Ca2theone
Small extras:
Thanks to everyone who has read this guide and I hope you like it!
Tuesday, July 28, 2009
The Curse of Arrav Guide
Here You are =P
Description: The icy waste to the north of the troll country is as mysterious as any land in RuneScape, no less because of the interest the Mahjarrat take in it. Ali the Wise thinks that he might have found a way for you to discover more about this strange area to the north. Uncover more of the mysteries of the Mahjarrat and learn about the dark magic that was used to enslave Arrav for these last few millennia.
Difficulty: Master
Length: Medium
Quest Requirements:
Defender of Varrock
Shades of Mort'ton
Troll Romance
Tale of the Muspah, The
Missing My Mummy
Skill/Other Requirements:
Level 37 Slayer
Level 41 Summoning
Level 61 Agility
Level 64 Ranged
Level 64 Mining
Level 64 Strength
Level 66 Thieving
Must have restored Senliten to 100%.
Items Needed at Quest Start: None.
Items Needed to Complete Quest: Any type of Pickaxe, Sacred oil(1), 3 Dwellberries, Ring of life, any type of Crossbow, Mith grapple, Macaw pouch, Insulated boots, Climbing boots OR Trollheim teleport runes.
Items Recommended for Quest: Weapon and Armour, Prayer Potions, Food, Amulet of glory(4), Varrock Teleport runes, and about 1k coins for transportation.
Items Acquired During Quest: Base key, Base plans, Code key, Decoder strips, Empty canopic jar, Full canopic jar, Heart in a canopic jar, Notes (a-j), Notes (k-z), Granite tablet, Shale tablet, Slate tablet, Stone tablet, Oil in a canopic jar, and Oil and berries in a jar.
Quest Points: 1
Reward: 1 Quest Point, 30k Mining XP, 14k Thieving XP, 9k Ranged XP, 9k Agility, 9k Strength XP, 4k Summoning XP, and 2.5k Slayer XP.
Start Point: A house on the northern edge of the town of Nardah.
To Start: Talk to Ali the Wise.
Instructions:
1. Speak to Talk to Ali the Wise in the house at the north end of Nardah to start the quest. He'll tell you that a contact of his has found some caves on Trollheim mountain, but wasn't able to excavate them.
Ali the Wise
2. Walk or teleport to Trollheim, and head northwest of the teleport location until you get to the Icy Gate. Just northwest of that is a cave entrance. Go in through the cave entrance and make your way through the caves. This area is populated with Ice Trolls (level 120+), so Protect from Melee is recommended.
Ice Cave Entrance
3. Head through the crevice at the end of the tunnel, then continue east and go through the next cave entrance.
Rubble Cave Entrance
4. In here, there are some piles of rubble which need to be cleared for you to get through. You will only be able to mine the rubble one time each, on the north, south, east and west sides. There are several kinds of rubble piles:
* Solid pillar - cannot be removed at all
* Rubble with large pile of stones on top - after you mine it, more rubble will fall in front of you
* Rubble with small pile of stones on top - needs to be mined twice
* Rubble with cracks in - only needs to be mined once
5. Go north and mine the small pile of rubble there twice. Then go back south, and then west; again mine the rubble. Lastly, head north then east and mine the rubble here. You can now continue through the caves.
Pile of Rubble
6. Make your way through the rest of the tunnels until you're able to get to the cellar in the southeast corner. Once there, search the short bookcase beneath the stairs to get Notes (a-j).
Bookcase
7. Go up the stairs and you'll see Arrav. Speak to him, and he'll attack. Attack him back. Before he can kill you, he will be be called away. He will then tell you to search behind the tapestry in the room to the south. Go to the southern room and search the tapestry to receive the Base key and Base plans.
Tapestry
8. Return to Ali the Wise in Nardah and update him on your progress. After a cutscene, you need to go to speak to Senliten, the pharaoh queen, just south of the Ruins of Uzer. She will give you an Empty canopic jar, and explain how to fill it. You will need Sacred oil(1), 3 Dwellberries, and a Ring of life. Use the Sacred oil(1), followed by the Dwellberries and the Ring of life, on the Empty canopic jar to prepare it. You will then receive a Full canopic jar.
Pharaoh Queen
9. Return to Ali the Wise in Nardah and show him the jar. He will give you advice on infiltrating Zemouregal's base which is located in the Wilderness under the Chaos Altar. You will need to bring Insulated boots, a Mith grapple, any type of Crossbow, the Base key, and a Macaw pouch with you.
Ali the Wise (Base Plans)
10. Zemouregal's base is located under the Chaos Altar in the low level wilderness, just to the northeast of Varrock. Teleport to either Edgeville using your Amulet of glory(4), or Varrock using runes, and walk to the altar.
Chaos Altar
11. Go under the Chaos Altar and follow the path until you reach a metal door.
Metal Door
12. Go east, following the path once again, until you reach a small room that contains a range. On the southern wall of that room, there is a pipe. Equip your Insulated boots and enter it.
Pipe
13. Follow the path until you reach another pipe. Once there, you need a way to remotely see if there are any patrolling zombies on the other side of the pipe, so summon your Macaw.
Macaw Pipe
14. Once your Macaw has been summoned, interact with it and click the "Remote view" option. It will then go in the pipe for you and scout the area, and then you will climb through the pipe. You will now be inside Zemouregal's base.
15. Once inside, run to the south room and search the tables for Decoder strips and Notes (k-z). Then, pick the lock on the nearby chest for the Code key.
Table
16. Run to the north and then to the east. You will see a Metal door and a keypad. Interact with the keyboard, and try to solve the puzzle code. If you fail, the room will become filled with gas, and you will become unconscious and be sent back to the beginning of Zemouregal's base.
Note: The combination key and final code are different for every player.
17. Once the latch is open and you enter the Metal door, equip your Crossbow and Mith grapple. Grapple the pipes to bypass the fire trap. Once on the other side, search the pedestal and take the heart. You will now have a Heart in a canopic jar.
Pedestal
18. Teleport out of Zemouregal's base and head back to Ali the Wise. Talk to him, and he will take the Heart in a canopic jar and give you your reward.
Congratulations! Quest Complete!
Quest Complete
Tuesday, July 21, 2009
The Curse of Arrav | Guide Coming Soon!
The Curse of Arrav
In your adventures you may have heard of an unusual gathering in the north - a gathering of powerful and dangerous creatures called the Mahjarrat. Ali the Wise has received news from one of his contacts of a tunnel underneath the area where the Mahjarrat are supposedly gathering. It’s not a natural cave, either: someone deliberately made it. But who? What connection did they have to the Mahjarrat now gathering above? Have they left any clues behind? Some exploring may be in order!
This quest is a continuation of the Mysteries of the Mahjarrat quest series. It’s also a sequel to a previous quest I wrote - Defender of Varrock. I’m glad that I got to expand on some of the themes I started in the previous Arrav-based quest. There is more to come, though…
Paul
RuneScape Content Developer
Summary:
Where to start The Curse of Arrav:
Speak to Ali the Wise in Nardah.
Requirements to start The Curse of Arrav:
37 Slayer
41 Summoning
61 Agility
64 Ranged
64 Mining
64 Strength
66 Thieving
Must have completed Defender of Varrock
Must have completed Shades of Mort’ton
Must have completed Troll Romance
Must have completed The Tale of the Muspah
Must have completed Missing my Mummy
Must have completely restored Senliten
In other news...
We've improved the behaviour in the Mobilising Armies waiting rooms to start more games with the required 20 players, rather than just one at a time.
Wednesday, July 15, 2009
Faruq's Tools for Games Update
Knowing that many of RuneScape's adventurers sometimes like to kick back and enjoy time with their friends and clan-mates, Al Kharid's newest resident, the mysterious entrepreneur Faruq, has brought to market a selection of curiosities to help pass the time between grand escapades.
If your clan needs fair ways of making decisions, then Faruq has something for you. If you want to have a race without any cheating or need something to mark the route, he can help. Whether you’re planning a scavenger hunt, a race, a seeking game or any kind of adventure within the adventure, Faruq asks only that you look at his wares, because he might have just what you need.
To peruse Faruq’s Tools for Games, check out the stall he has set up next to Ali Morrisane in Al Kharid market.
This is an unusual update for us, because, unlike just about everything else in RuneScape, we haven’t planned out what you should do with it. During development, we thought of things you could do, of course, but I’m eager to see what else you can come up with yourselves.
To make the tools, we sought suggestions from the forums, fan sites and various corners of Jagex. It all helped shape the project, and some of the players who made suggestions when the developer blog went out should find certain objects very familiar: congratulations on making your mark on the game!
Mod Hew
RuneScape Content Developer
In other news...
You can once again walk out of Edgeville’s bank using the minimap when heading north-east!
We’ve removed a small selection of items from the Grand Exchange to improve offer matching. For example, all but the (8) and (1) charged variants of the games necklace have been removed. The removed items can still be traded; they just no longer show up on the Grand Exchange.
Wednesday, July 8, 2009
Mobilising Armies | Guide Coming Soon
Mobilising Armies is a new multiplayer combat minigame, but instead of controlling your avatar you’ll be controlling a whole battalion, deploying your squads with tactical precision and trying to second-guess the intentions of your opponents. There are four different scenarios to play in: Conflict, Siege, Hoard and Rescue. Each presents its own set of challenges, such as building catapults, collecting resources and stealing from your opponents, to name just a few. Don’t worry about finding three other players, though: when you turn up at the command centre the officers will arrange your match for you.
As we all know, war isn’t cheap, so with Mobilising Armies we are introducing a commodity-exchange system. If, after training a skill, you’re left with a lot of commodities that you don’t need yourself (e.g. a surplus of jewellery after training Crafting), you’ll be able to trade them in at the command centre for investment credits, which can then be exchanged for squads and special units, such as cannons, barricades or exploding chinchompas. You can also choose to stake investment credits in an impending battle for a larger payout of reward credits, which can in turn be spent on additional items.
There are a variety of rewards for victorious commanders, including quest kits that let you hold much-needed questing tools in one inventory slot, resource locators that’ll teleport you directly to resources such as mining spots and trees, and “spoils of war”, which are a selection of resources, gold and items that will allow you to train your skills further
Good luck, and enjoy!
Mod Tim, Lead Content Developer, and Mod Maz, Content Developer and Queen of the Squirrels
(For a look at some of the technical challenges we've faced in developing this minigame, take a look at this recent blog post from Andrew, titled Mobilising Armies.)
Summary:
Mobilising Armies can be found south of the Feldip Hills and west of Oo’glog. You can get there using any of the following:
* Spirit trees
* The Mobilising Armies Teleport spell in the standard spellbook
* The Ring of Duelling
There are no requirements to start playing, but to keep playing you’ll need tradeable commodities.
In other news...
We’ve added the ability for you to make notes. To access this new feature, click on the Notes icon at the bottom-right of the screen. This remarkably simple system enables you to leave up to 30 notes for yourself, each of which can be up to 50 characters long.
On a related note, any invalid player names saved in your Friends/Ignore lists have been marked with a *. From now on, you will only be able to add valid player names to your Friends/Ignore lists.
We’ve also moved the Summoning interface’s functionality to the Summoning icon next to the minimap – simply right-click on this icon for all your pet/familiar needs. We’re aware this leaves a blank ‘stone’ on the interface; there is another new feature planned to go in that space.
We've added an alternative sitting position when you rest. You can toggle how you sit by clicking rest again to choose your preferred pose.
Zanik's crossbow can now be used with many more varieties of bolts. It seems that it only used a small selection beforehand.
The filter for the quest list will no longer remove quests you've already started.
Summoning scrolls should no longer interfere with special attack energy replenishing.
You can no longer use fairy rings while you are tele-blocked. This seemed a bit inconsistent with other areas of the game.
You can now take familiars over the bridge towards Zamorak in the God Wars Dungeon, so you don't have to dismiss them and then summon them again after crossing.
Tuesday, June 23, 2009
Extended Agility courses
"If you are serious about Agility, it’s likely you've not been to the Gnome Stronghold or Gunnjorn's barbarian course for some time. This week, that could change, as these Agility trainers have spent long hours constructing new routes around the courses that only the most agile players should attempt.
These extended courses will not only give you a chance to show off your most agile moves, but will also reward you with weight-reducing clothing, should you complete enough laps.
With the addition of these extended courses, the cave goblins of Dorgesh-Kaan have made some changes to their Agility course, too. They’ve decided to make the course a little less unforgiving, so you should find that you fail less often. The other main change is that the entry requirement for the existing course has been increased from 70 Agility to 80 Agility, while the two extended courses have entry requirements of 85 and 90 Agility, respectively.
Mod Chris L
RuneScape Content Developer
In other news...
We've added a right-click option that will let you quick-start your circus performances, as long as you've been to the circus at least once in the past.
We've now added a new song to the Wilderness Volcano area called Eruption. Check it out when you have a chance!"
Tuesday, May 19, 2009
Missing My Mummy | Quest Guide

| Start: Speak to Leela in Draynor Village |
| Difficulty: ***** |
| Length: Medium |
| Members only: Yes |
Requirements:
For total completion:
|
Items needed:
Recommended Items:
|
Monsters to kill:
|


Spoiler warning: Plot and/or ending details follow.
edit Walkthrough
- Talk to Leela about a pyramid in the region of Uzer. She wants to resurrect a mummy in a region south of Uzer in a pyramid called the "Uzer Mastaba".
- Go to the pyramid (Fairy ring D-L-Q) and go inside (Another option is to go through the shanty pass and take a carpet to Uzer, total cost of 205gp). Pick up the Tattered bag" on the ground. (They currently have no use at the moment).
- Rummage skeletons to turn them into Skeleton looters. They will turn agressive and attack. Kill all of them. One of them will drop the Scroll of the Dead.

- Return to Leela and she will tell you that you need to reconstruct the body to 75% as well as find out her identity and reform her shadow.
[edit] Collecting objects
- Talk to the Golem to the east.
- Talk to the Golem Guard guarding the door and then kill him with crush attack style.
- Descend down to the second level.
- Make sure you pick up the Mummy's hand and the Canopic Jars.
- Go into first the west offshoot to the tunnel and collect the jars. Then, head east and get the jar and the Mummy's body with no hands.
- Combine this with the Mummy's hand to get Senliten's Mummy.
[edit] Floor Puzzle

Find a way over the Floor Puzzle to the Tomb. This puzzle is different to every player and changed with every visit.
| Stepping on a | blue stone rises the red tiles. Not dangerous. | |
| red stone rises the green | ||
| green stone rises the yellow | ||
| yellow stone rises the blue |
The easiest way is to try and find a path of blue & green blocks or red & yellow blocks all the way through as this will result in no damage.
| Stepping from | green to red triggers a trap. Players can take damage. | |
| red to blue | ||
| yellow to green | ||
| | blue to yellow |
[edit] Restoring the Tomb

A player restoring the statue of Apmeken.
Right-click the Pyramid Journal or the Scroll of the Dead and select the Check progress -option, this shows the percentage of completed actions and the quantity of remaining actions. The quest completion requires 75% complete, though continuing beyond that rewards more experience.
- Place the Mummy's body back into the sarchophagus.
- Place the Canopic Jars onto the empty shelves to the west.
- Pray at each of the statues to restore them. Restoring all statues drains a total of 70 prayer points and gives a total of 6,500 Prayer experience.
- Note: Amascut's altar will boost your prayer at the cost of some health; the other altars restore prayer normally.
- Repair the table with a hammer and a saw. This rewards 2,100 Construction experience.
- Make some spiced wine by adding spice into a jug of wine. Put the spiced wine onto its space.
- Put a pot of grain (not pot of flour) onto its space. This rewards 2,100 Cooking experience.
- Go into the eastern chamber and kill the level 41 Tumeken's shadow.
- Note: Each brazier requires 5 fire runes to light. The required Magic level starts at 20, and increases by 5 for each brazier.
- Light the southern brazier, requiring level 20 Magic. Tumeken's shadow appears again, with a combat level of 50. Kill the shadow to receive 600 Magic experience.
- Light the northern brazier. The shadow (now level 55) appears again. Kill it to receive 900 Magic experience.
- Light the western brazier. A level 64 spirit will spawn. Kill it to receive 1,200 Magic experience.
- Finally, light the eastern brazier. Tumeken's shadow appears for the last time, being level 72. Kill it to receive 2,000 Magic experience.
- Build the statue with some Willow logs and a knife.
- Create the statue of the queen and then click improve twice to complete the body double section.
- You can return to Leela and complete the quest after being 75% complete.
[edit] Total completion
- To complete the name of the Queen, go to Ali Morrisane. He says he can make a copy of the original. Get him a spring sq'irk by doing the Sorceress's Garden minigame. After you gave him the sq'irk, he will give you a copy of the name. You will recieve Theiving experience. Next time you talk to him with your Ring of charos(a) equipped, he will give you the original.
- Travel to Reldo in the Varrock Palace. He says he needs an Al kharid flyer, which you can get from Ali the Leaflet Dropper between Varrock and Al Kharid. Bring him the flyer and he will give you a scroll of praise. Bring the scroll of praise and Mummy's name papyrus (original and copy) to the queen for 100 percent completion.
edit Rewards

Missing My Mummy Quest| Guide Coming Soon
Today comes a new adventure in the desert.
"19th May 2009 - Missing My Mummy
There are many secrets hidden in the depths of the desert. Forgotten tombs of forgotten rulers from a forgotten time, when the world was a very different place...or at least they were forgotten. The spread of human civilisation, however, means that many of the hidden corners of the world are being uncovered, often by treasure-hunters with little regard for preserving the sanctity of these ancient places.
Recently, one such tomb, near Uzer, was discovered by treasure-hunters. Leela of Al Kharid does care about the sanctity of this particular place, and she wants your help to recover information that is of great importance to her.
Mod Newmatic
RuneScape Content Developer
Warning – Mild Spoilers
Please note that we haven’t forgotten about your request to not start too many new quest series until we have continued with, and finished, a few of the existing ones. While it might not seem like it initially, this quest is actually part of the same quest series as Tale of the Muspah; this one just approaches things from a very different direction, so it’s probably not entirely clear how things fit together yet.
We’ve been calling this quest series Mysteries of the Mahjarrat here in the Jagex office. It is going to be tying together a few loose ends from various quests, and hopefully bringing more cohesion to parts of the Runescape mythology and storyline. While we’re starting the quest series with low-level requirements, later quests will have progressively higher requirements as we draw in the different existing storylines. Additionally, Missing My Mummy also ties into some of the ongoing desert storylines.
Paul
Summary:
Requirements to start Missing my Mummy:
35 Cooking
35 Construction
35 Crafting
35 Magic
35 Prayer
Must have completed Prince Ali Rescue
Must have completed The Golem
Must have completed Icthlarin’s Little Helper
Requirements for total completion:
25 Thieving
45 Crafting
45 Prayer
50 Magic
Must have completed Garden of Tranquillity
In other news...
We have improved Low and High Alchemy so that if you don't time your clicks correctly, it'll still return you to the spellbook after your inventory. Hopefully you'll find this useful when you’re going about your daily alching! You can also queue up one to cast while the current spell is being performed.
We have added an activity bar to the Soul Wars minigame. If you've been taking part in the game the bar should remain green, but if you don't take part the bar will slowly turn orange, and eventually run out, at which point you'll be removed from the game.
You'll find that after killing someone in a Bounty or PvP world you'll have a bit of time to pick up drops before potentially being whisked away for a random event."
Wednesday, May 6, 2009
I TOLD YOU SO =P
A couple post ago I informed you that bounty hunter was being re-released and you should invest in prayer pots and sharks etc.. and Look what happened:
"This week’s update introduces Bounty Hunter ‘Wilderness-only’ PvP worlds (or ‘Bounty Worlds’). Our aim was to get something that feels as close to the original Wilderness as we can manage, and to add another thrill with the Bounty Hunter mechanic. The new worlds are limited to the Wilderness, and use the old ‘who can attack who’ levels.
"This week’s update introduces Bounty Hunter ‘Wilderness-only’ PvP worlds (or ‘Bounty Worlds’). Our aim was to get something that feels as close to the original Wilderness as we can manage, and to add another thrill with the Bounty Hunter mechanic. The new worlds are limited to the Wilderness, and use the old ‘who can attack who’ levels.
Bounty Worlds are basically a mix of 3 previous PvP games. It has the best bits we can reuse from Bounty Hunter, PvP worlds, and the old Wilderness. In short, we’ve increased the chance to get your opponent’s items and we added the thrill of hunting a bounty within the Wilderness while surrounded by hundreds of potential PKers.
Here’s how it works:
You can attack anyone within the level range determined by the Wilderness level, starting with 1 just above Edgeville to 56 at the top of the map. If you kill someone who isn’t your bounty target, it is considered a ‘rogue kill’. There is no penalty for rogue kills any more. It will add 1 to your ‘rogue kills’ highscore, and you will get a drop based on the ‘drop potential’ mechanic from PvP worlds (see here for more details). We have, however, made it so that, when drop potential is converted to items, it is 3 times more likely to give you items your target was carrying, as opposed to generated items. The average size of the rewards is based on your drop potential the same as in PvP worlds.
After you have spent 30 minutes in a dangerous area on a Bounty World, the system will start looking for suitable ‘bounty targets’ for you. After 60 minutes, the chance of being assigned a target increases further. (Note: this doesn’t have to be all in one go, and isn’t reset by leaving.) Your target will always be a similar level to you. To make things even more interesting, you will also be their target! If you kill your target, it will add 1 to your ‘bounty kills’ highscore, and you will receive a generous boost to your drop: the average size of these drops is boosted by an extra hour of drop potential (just as if you’d spent an hour in a hot zone), on top of the drop you would receive normally. In addition to this, we’ve made it more likely that you’ll get items from your opponent’s actual inventory for killing your target – this also applies to rogue kills and in normal PvP worlds, but at a lower rate.
To make sure you have a chance of getting to the rewards, there are a couple of extra rules. Firstly, if your bounty target is fighting someone else in a single-way combat area, you will be able to attack your target, and their original foe will be locked out. Secondly, if you are fighting your enemy but do not inflict enough damage to count as the ‘hero’ (in the same way as drops are awarded when fighting monsters), your target will remain your target. Basically, your bounty target will remain your bounty target until one of you kills the other, or one of you leaves the Wilderness for more than ten minutes.
It isn’t all about the rewards, of course: it’s also about the thrill of trying to hunt someone down in an environment where the levels are well-matched. That’s why we brought back the old Wilderness levels, and restricted the action to the old Wilderness area. You can only fight in the Wilderness, and the only other area available is Edgeville, where you can restock and prepare for battle. You have to be in one of those areas before you can log into a Bounty World. So, head to Edgeville, switch to a Bounty World, and see if you can work your way up the Rogue/Bounty Hunter highscore tables.
Andrew
Lead Developer
In Other News…
Thirsty adventurers should head to the poll to take part in our latest vote: Guaranteed Content – Name a Pub. We have made a shortlist of your very best pub suggestions, and now we need you decide which one is your favourite. The winning idea will be added to the game in the coming months. You can find the poll under the 'Community' drop-down tab above.
Similar to the changes we made to the way PvP worlds work to prevent people from using fun weapons or low-level spells, we have updated the system to detect other ways of fighting without taking any risks. Now, if you see anyone in single-way combat who is fighting without taking any apparent damage over an extended period of time, you can jump in and teach them how fighting works.
The lilies of the valley have finished blooming, and have been removed from the game. Any you might have had lying around have been whisked away.
Leprechauns can now convert clean herbs to banknotes for you. Previously, if you'd accidentally cleaned the herb, the leprechaun wouldn't accept the herb.
The in-game skill guides now link to an appropriate page in the Game Guide if you wish to find out more information."
Monday, May 4, 2009
Insight into the Future of Runescape
I found This very Interesting. It is Jagex Mod Andrew answering some interesting Questions

Sunday, May 3, 2009
Bounty Hunter Being Released again!
Last week I made a post talking about a new pvp being released. Well after much snooping around I figured out what they were doing. Jagex is releasing Bounty Hunter Specified Worlds. Now I'm guessing it's not going to work like the old bounty hunter. It will probably have a drop system similar to that of the new wilderness. Anyways , I just thought I'd keep you updated. =P
Now I'm guessing it's not going to work like the old bounty hunter. It will probably have a drop system similar to that of the new wilderness. Anyways , I just thought I'd keep you updated. =P
Monday, April 27, 2009
New Runescape PvP to be Released
That's Right! Within the next couple of weeks Runescape is releasing a new PvP aspect to the wilderness. Unfortunately, that's about all I've been told about it. I don't know the exact date this will be released and I don't know exactly how it will work. But I do know this is a great oppurtunity for Runescape Guides Reader's to make a bit of money. Since this update will involve player killing you can invest in items that are used in pking. For example: Sharks. With new updates come a splurge of people. Since this will be an update aimed at PVP you can expect food to start soaring. Everyone is going to buy sharks and eventually they will sell out causing them to rise. That's why you should start buying sharks NOW. Currently they are in the 800-900's range. I expect when this update is released it will soar to over 1k ea. thats around 200 profit ea. You buy 1k you make 200k profit. You buy 10k You make 2M Profit. Another good idea would be investing in Prayer Potions, ranars, ranarr seeds. Consumables that will be used in pking are the most assured things to rise. But, there is potential for other items to rise too. Such as Whips, Dragon Daggers,Dragon Boots/Rune Boots/Climbing boots. Pretty much just ask yourself: "What gets used alot for Pking?" The things you can think of, are the things that will raise.
So Start investing NOW!!!!
and don't forget where you heard this news first=P
So Start investing NOW!!!!
and don't forget where you heard this news first=P
Tuesday, April 21, 2009
Tale of Muspah Guide | Walkthrough
Here is the Runescape Quest Guide for Tale of Muspah.


- To start the quest you must first talk to Erjolf, who can be found on the mountain to the north-east of Rellekka. Fairy ring code D-K-S can be used for quicker access. He is excited about finding a new cave.
- Follow him as he leads you into the cave.
- Talk to him again and he’ll tell you that he thinks he might have spotted some armour frozen in ice which he thinks will help him to complete The Fremennik Trials.
- Ask him about his progress with the trials and he’ll ask for your help to get the armour from the ice. Offer to help him, and he’ll tell you that you need to build a raft by using a knife with the driftwood.
(A knife, tinderbox and spade may be obtained from Erjolf by telling him that you need some tools to melt the ice.)
- Use the spade on a mound of snow by the cave water exits, to block the south and west streams to make the water run towards the east. Set 4 fire rafts to melt the small icicles then repeat the same strategy for the other sides.
- NOTE: It does not matter what order you do these, when you are finished, Erjolf will have you come speak with him.
North side
- To melt the icicles on the north side , block the west stream and east stream, leaving the south stream unblocked. Then set 5 or 6 fire rafts to line up along the north edge of the iceberg to melt the icicles there. To do this you need to go on north edge and line yourself up so you see the corner of the north side on the left and set the fire raft on fire. Step a square to the right and do this again, keep going until you see the ice melt. Set them off quickly or they will disappear.
East side
- Block both the East stream and the West stream, have the South stream unblocked. Go to the North stream, On the West side go 2 steps to the west from the flat rock, then walk 2 steps to the south, that is perfect. Now set off 5 or 6 fire rafts.
South side
- To melt the icicles on the south side, block the east and south streams. Leave the west and north stream unblocked. Let 5 or 6 rafts go at once from the south-east so that they pile up on the rocks and line up against the south side of the island.
West side
- Finally, Block the West stream and block the South stream. Stand on the Northwest side where the snow points south on the West stream, stand in the middle and set 1 Fire Raft off, it will hit on the northern side of the West side. Jump the flat rock and cross over. Going just to the Southwest side of the West stream, stand in the pushed up part of that side and set off another 1 raft. That will now finish off the West side (the south side of that West side)
Finishing up
Once you have melted all the icicles the child will ask you to come talk to him. you will then see a frozen monster inside the ice. After some talk he will then say you have to find an outlander in the Trollweiss hunting area.
The monster in ice.
This outlander is a natural histories expert. He is up on the platform above the normal birds area. From there, go north all the way, then east, to find the historian. He will, after some conversation, ask you to describe the creature
- the monster is yellow,
- has four arms,
- has no legs like a snail,
- a spiky head
- Spikey tail,
- and crab claws.)
- The outlander is called ‘Natural Historian’ and he is located in the kebbit area of the Trollweiss hunter area, around the back of the big ice block, to the north-east. He’ll tell you it looks like a mythical beast and to find a statue of the monster in the desert mining camp.
Once you have described it for him he will tell you that you must find a statue in the Kharidian desert east of the mining camp, and north of Pollnivneach.
- The statue is far east of the mining camp along the large eastward bend in the river. It will appear as a sand pile, and you must dig it using the spade you were given earlier.
- Ali the Wise will appear and talk to you. When he is done talk to him again and ask him about the Muspah. He will say you need 4 cut sapphires, 4 water runes and 4 cosmic runes and a knife.
- If you ask him if he could take you back to the cave, he will give you a Camelot teletab.
- Head back to the Muspah cave and mine 4-8 sapphires, then cut with a chisel. The eight sapphire rocks in the cave may only be mined once.
- Do as Ali the Wise told you to, bore the sapphires onto the ice and enchant the sapphire. Then the ice will melt, revealing the Muspah inside. The same sapphires may be used for freezing and unfreezing later in the quest, so it’s possible to keep 4 sapphires at the end of the quest.
- Erjolf will run away as the Muspah starts to move. Talk to the Muspah to find that he is actually Jhallan, one of the shape-shifting Mahjarrat that accidentally transformed to the Muspah while he dreamed of it in his nightmare, and it consumed much of his energy.
- Jhallan will ask you to repeat the process, so he could return to his hibernation, only this time he will choose a place safer.
- Go and find Erjolf, who is just outside the cave. Ask him and he will tell you that the only way to get to the other side of the cave is by canoeing. He will tell you to meet him at the West Trollweiss hunting area, before the snow. Remember to bring a hatchet.
- Meet him at the west hunting area. He will point you to the great log that you can carve a canoe from. Press the log and your player will do a bit of “crazy-slashing” on the log, creating a crude canoe.
- Take the canoe and once you reached, enter the cave that is right in front of you.
- Go to the centre area to find Jhallan, already weakening, he will ask you to find him a cave that is dark, no water flow, not too warm and not in the middle of a tunnel.
- The only spot suitable is the furthest south-west cave. Items needed: knife, hatchet, 4 sapphires, 4 water & 4 cosmic runes
- Before you enchant the Sapphire, you will scare Jhallan into eventually giving you a fake Muspah tail.
- Take the canoe back to Erjolf, and you will give him the tail.
- Congratulations, Quest complete!
Rewards

Tale of the Muspah Guide| Coming Soon
The Guide for this quest can be found here Tale of the Muspah Guide
This was Taken from the Runescape Home Page. A Tale of the Muspah Quest Guide Will be uploaded as soon as possible. =P
"Experienced adventurers will be familiar with Fremennik rites of passage, and the difficulties they present. It’s little wonder, then, that Fremennik children are always on the lookout for an easier path to adulthood, and Erjolf is no exception. Full of enthusiasm but short on skills, Erjolf will need your assistance if he is going to impress his kinsfolk.
Join him in his quest for a trophy, unravel the puzzling story behind a curious corpse, and discover the dark secrets of one of the most fearsome races to ever walk in Gielinor. You may find one or two useful allies along the way, who are willing to lend a helping hand.
It’s been great to work on a quest that involves one of RuneScape’s most mysterious races, and develop a plotline that’s been around since the early days of RuneScape. This is the first part of a new quest series, and paves the way for following quests.
Mod Roderick
RuneScape Content Developer
Summary:
| Where to start Tale of the Muspah: Talk to Erjolf, north-east of Rellekka, at a cave halfway up a snow-covered mountain path.Requirements to begin Tale of the Muspah: 10 Magic 10 Woodcutting 8 Mining 6 Firemaking 20 Crafting would be an advantage |
In Other News…
Picking from a tree or bush has been sped up.
Several items that previously damaged you when used can no longer kill you. Don't worry, though - you can still use them to reduce your Hitpoints if you want to.
The Easter 2009 update has now been removed, and the associated music unlocked for all."
Wednesday, April 8, 2009
Splitting Heirs: Runescape 2009 Easter Event Guide
Splitting Heirs Guide
Quest start: South of Falador, due North-West of Rimmington Mine, Talk to Easter Bunny
Requirements: None
Recommendations: Energy enhancing items

Talk to the Easter Bunny, and he will say that there has been (yet another) problem this year. He went away on a little holiday, as he's now too old for egg delivery, so he left his son in charge of the egg factroy, which is now in bits due to his son's laziness.


Ask how can you help, and he will explain that you need to help repair the Egg Plant. After agreeing to help, go down the bunny hole, and you will be transformed into a small rabbit. (See picture) Head North, then West, then North, then West again, then finally straight North, until you come to another bunny hole in the wall. Upon going through this hole, you will be returned to normal form. head north straight through the workshop, through the North-Eastern exit, then haid straight West and talk to Easter Bunny Jr. and ask him why he is't fixing the factory, and he'll reply in a rather "spoilt brattish" fashion. Following through the dialogue, he'll tell you that there is a to-do list in his father's office. Head East into the office, and look at the notice board. The tasks you need to complete are:
Feed the Egg Bird
Round Up the Implings
Fix the Incubator
Retrain the squirrels
I think that these need to be done in this order, as when I tried it on my pure, I found I had to follow the same order.
Step 2A: Fine Food....
Go and talk to the Egg Bird. It's in the center of the main room, and looks like a massive cartoon Parrot. Blow a Raspberry at it, to startle it awake. Upon talking to it again, it will squawk, and demand that you feed it. It will then give you a clue as to which seed it would like to eat. Im assuming these are random, and the seed bags are on the eastern side of the room, directly east of the Egg Bird. Search each bag to find the correct food you need. from North to South these are:
Poppy; Sunflower; Cracker Bits; and Worm Chunks.

Use the food on the Seed bowls situated either side of the Egg Bird. If you make a mistake, simply right click and "Empty" the Seed bowl.
Step 2B: ...And Claret Wine...
Now you must get the Bird some water. Head North of the Bird, and you will see a water tank. click on it and you'll
recieve a bucket of water.(See Picture)Simply use this on the Water Bowl, and then talk to the Bird once more. Follow through the dialogue.
Talk to Easter Bunny Jr who is next to the Bird. Follow through the dialogue, and say that the Bird is a highly intelligent life form producing profit through chocolate. He will then complain about the Implings roaming around A.W.O.L, and also give you the tip of the nets his dad uses to catch them. Head back to the Easter Bunny's office. Grab 5 impling jars from the spawn points on the South side of the office, (See Picture) and the net in the North East corner. Wield the net, and head out the East exit of the Workshop. Run around these tunnels, catching all the Implings you can find.
They are in the following locations, represented by a blue dot on the map:

Now head back into the main Workshop, and look at the Egg Painting Machine. Easter Bunny Jr will appear and complain again about the noise, and the Implings will be rather sarcastic. You must compliment the Implings' work, by saying that an impling painting an egg twice it's own height is pretty cool. Again, he will disappear, being rather lazy.
Talk to the Impling worker next to the Incubator, which is in the North of the Workshop. He will explain that the blueprints are hidden somewhere in Easter Bunny Jr's room. The blueprint is on the North side of his room, under the shelf (See picture). Read it to see where the parts should go. Search around the Workshop for crates. In them you will the items you need to repair the Incubator. In each box that contains the items, there are two items. Not all the boxes have the things you need. Using the blue print, repair the machine accordingly. First, use the Cog on the Incubator, then use the Pistons on the same. Next use the Chimney on the Incubator. Use the Sooty pipes on the coal supply, the wet pipes on the water supply, and finally the clean pipe on the controls. Now that the machine is complete, talk to the Impling Worker again, then finally Easter Bunny Jr. Again, you have to sell it to him, call the machine "One of a kind." He'll now ask you to sort out the "fluffy tailed rodent" on the Nut Machine.
Go over to the nut machine, and click it, then select "Talk to Big Ben." He'll introduce himself as the big nut of the machine, and will also remind you in a charming cockney accent, not to give them trouble, or you'll be sucking peanut mash through a straw for a while. You'll eventually tell him you need him to get back to work, and he'll say that'll cost you. You'll then state the exact amount of cash you have in Gold Pieces in your bank (In case you didn't read that last bank statement), and he'll reply they don't gold, they want.... Nuts! Go for a 20% cut, and you'll haggle for a while. You'll finally settle on a 25% deal. He makes a comment on your poor easter puns, and makes a yolk himself, and also, mentions that they kinda somehow sorta maybe have forgotten the ability of possibly... sorting nuts? You make another eggsellent pun, and then you'll have to get to work, training them squirrels. When you see these nuts in this red area:

Click the red button. If you make a mistake, you'll go down by one nut. This can take quite a while to do, around 10 minutes. When you've done 10 nuts, click the button that appears to stop training squirrels.
Follow through the dialogue, including the passing of insults. Once more, compliment the workers, by saying they are "highly trained defect detectors".
Finally, meet the Easter Bunny Jr in his dad's office. He will say he is ready to take on the factory. A short cutscene will ensue, where he dresses up as a pink bunny, and asks you to call on his father. Run back out through the bunny warren, the same way you came in, and once more, you will be bunnified. In case you forgot, the directions are: South, East, South, East, South. Now talk to the Easter Bunny, and follow through the dialogue. Another short cutscene follows with him stepping out of his suit. You will be rewarded with a Large Carrot, which is a fun two-handed weapon:

And the "Round the World in Eggty Days":
Congratulations You have finished Runescapes Splitting Heirs Quest for the 2009 Easter event.
Quest start: South of Falador, due North-West of Rimmington Mine, Talk to Easter Bunny
Requirements: None
Recommendations: Energy enhancing items
Step 1: A Real-Burrow Load of Mess...
Talk to the Easter Bunny, and he will say that there has been (yet another) problem this year. He went away on a little holiday, as he's now too old for egg delivery, so he left his son in charge of the egg factroy, which is now in bits due to his son's laziness.
Ask how can you help, and he will explain that you need to help repair the Egg Plant. After agreeing to help, go down the bunny hole, and you will be transformed into a small rabbit. (See picture) Head North, then West, then North, then West again, then finally straight North, until you come to another bunny hole in the wall. Upon going through this hole, you will be returned to normal form. head north straight through the workshop, through the North-Eastern exit, then haid straight West and talk to Easter Bunny Jr. and ask him why he is't fixing the factory, and he'll reply in a rather "spoilt brattish" fashion. Following through the dialogue, he'll tell you that there is a to-do list in his father's office. Head East into the office, and look at the notice board. The tasks you need to complete are:
Feed the Egg Bird
Round Up the Implings
Fix the Incubator
Retrain the squirrels
I think that these need to be done in this order, as when I tried it on my pure, I found I had to follow the same order.
Step 2: Feeding the Egg Bird:
Step 2A: Fine Food....
Go and talk to the Egg Bird. It's in the center of the main room, and looks like a massive cartoon Parrot. Blow a Raspberry at it, to startle it awake. Upon talking to it again, it will squawk, and demand that you feed it. It will then give you a clue as to which seed it would like to eat. Im assuming these are random, and the seed bags are on the eastern side of the room, directly east of the Egg Bird. Search each bag to find the correct food you need. from North to South these are:
Poppy; Sunflower; Cracker Bits; and Worm Chunks.
Use the food on the Seed bowls situated either side of the Egg Bird. If you make a mistake, simply right click and "Empty" the Seed bowl.
Step 2B: ...And Claret Wine...
Now you must get the Bird some water. Head North of the Bird, and you will see a water tank. click on it and you'll
recieve a bucket of water.(See Picture)Simply use this on the Water Bowl, and then talk to the Bird once more. Follow through the dialogue.
Step 3: Impetuous Implings...
Talk to Easter Bunny Jr who is next to the Bird. Follow through the dialogue, and say that the Bird is a highly intelligent life form producing profit through chocolate. He will then complain about the Implings roaming around A.W.O.L, and also give you the tip of the nets his dad uses to catch them. Head back to the Easter Bunny's office. Grab 5 impling jars from the spawn points on the South side of the office, (See Picture) and the net in the North East corner. Wield the net, and head out the East exit of the Workshop. Run around these tunnels, catching all the Implings you can find.
They are in the following locations, represented by a blue dot on the map:
Now head back into the main Workshop, and look at the Egg Painting Machine. Easter Bunny Jr will appear and complain again about the noise, and the Implings will be rather sarcastic. You must compliment the Implings' work, by saying that an impling painting an egg twice it's own height is pretty cool. Again, he will disappear, being rather lazy.
Step 4: Upon Eggzamination of the Incubator...
Talk to the Impling worker next to the Incubator, which is in the North of the Workshop. He will explain that the blueprints are hidden somewhere in Easter Bunny Jr's room. The blueprint is on the North side of his room, under the shelf (See picture). Read it to see where the parts should go. Search around the Workshop for crates. In them you will the items you need to repair the Incubator. In each box that contains the items, there are two items. Not all the boxes have the things you need. Using the blue print, repair the machine accordingly. First, use the Cog on the Incubator, then use the Pistons on the same. Next use the Chimney on the Incubator. Use the Sooty pipes on the coal supply, the wet pipes on the water supply, and finally the clean pipe on the controls. Now that the machine is complete, talk to the Impling Worker again, then finally Easter Bunny Jr. Again, you have to sell it to him, call the machine "One of a kind." He'll now ask you to sort out the "fluffy tailed rodent" on the Nut Machine.
Step 5: It Costs Peanuts to Train Squirrels...
Go over to the nut machine, and click it, then select "Talk to Big Ben." He'll introduce himself as the big nut of the machine, and will also remind you in a charming cockney accent, not to give them trouble, or you'll be sucking peanut mash through a straw for a while. You'll eventually tell him you need him to get back to work, and he'll say that'll cost you. You'll then state the exact amount of cash you have in Gold Pieces in your bank (In case you didn't read that last bank statement), and he'll reply they don't gold, they want.... Nuts! Go for a 20% cut, and you'll haggle for a while. You'll finally settle on a 25% deal. He makes a comment on your poor easter puns, and makes a yolk himself, and also, mentions that they kinda somehow sorta maybe have forgotten the ability of possibly... sorting nuts? You make another eggsellent pun, and then you'll have to get to work, training them squirrels. When you see these nuts in this red area:
Click the red button. If you make a mistake, you'll go down by one nut. This can take quite a while to do, around 10 minutes. When you've done 10 nuts, click the button that appears to stop training squirrels.
Follow through the dialogue, including the passing of insults. Once more, compliment the workers, by saying they are "highly trained defect detectors".
Step 6: A Carrot and Stick Situation...
Finally, meet the Easter Bunny Jr in his dad's office. He will say he is ready to take on the factory. A short cutscene will ensue, where he dresses up as a pink bunny, and asks you to call on his father. Run back out through the bunny warren, the same way you came in, and once more, you will be bunnified. In case you forgot, the directions are: South, East, South, East, South. Now talk to the Easter Bunny, and follow through the dialogue. Another short cutscene follows with him stepping out of his suit. You will be rewarded with a Large Carrot, which is a fun two-handed weapon:
And the "Round the World in Eggty Days":
Congratulations You have finished Runescapes Splitting Heirs Quest for the 2009 Easter event.
Subscribe to:
Posts (Atom)
