

TEAM KILLING
Part 1 - General Information
Part 2 - Specializations
Part 3 - Equipment
Part 3.1 - Meléers with One-Handed Weapons
Part 3.2 - Meléers with Two-Handed Weapons
Part 3.3 - Rangers with One-Handed Bows
Part 3.4 - Rangers with Two-Handed Bows
Part 4 - How To Get There
Part 5 - Other
Part 5.1 - If a Revenant Ghost turns up!
Part 5.1.1 - Catching Sight of a Revenant Ghost
Part 5.1.2 - If You Get Attacked By a Revenant Ghost
Part 5.1.3 - If a Team Mate Gets Attacked By a Revenant Ghost
Part 5.2 - Something missing?
Part 6 - FAQ
Part 7 - Credits
Part 1 - General Information
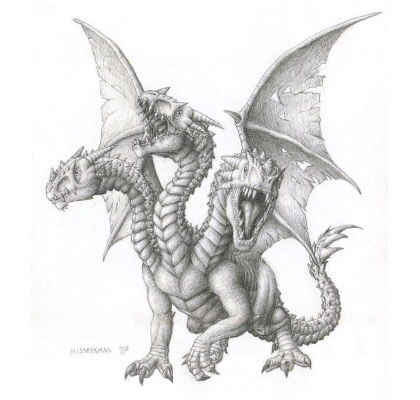
The King Black Dragon is a dangerous trip. Many people of prowess have been slain by this beast. It's poison, ice and fire-y breaths are what make it the king of all black dragons, the 50+ hits are the ones you must look out for.

Part 2 - Specializations
Location: King Black Dragon Lair ~ The entrance is located in level 38 wilderness.
Combat: 276
Hitpoints: 257
Attacks: Melee, Magic and DragonBreath.
Classification: Animal/Dragon.
Major Drops: This beast drops the formidable Draconic Visage. This sells for huge profits! If you get it towards the end of the trip with less of you, well, cha-ching, free monies. The original dragon item, the Dragon Med Helm, is also dropped by this monster, the first to do so, these are no longer shared as they are worth little. It would be silly to have 20k each!
Special Notes: He has three heads. These hit in turn but each has a different ability. These are:
Fire; this hits very hard and has a chance to lower your stats. If you are wearing a Dragonfire Shield, you will absorb this into your shield.
Ice; this freezes you to the spot for around five seconds, and hits medium damage. On occasions it stuns you, reducing your stats slightly.
Toxic; this heavily poisons you. The poison starts by hitting 8s and slowly decreases (Like Regular Poison). This hits low to medium damage.
Part 3 - Equipment
Part 3.1 - Meléers with One-Handed Weapons

Best to Worst:
Code:
H: Helm of Neitiznot / Berserker Helm / Proselyte Helm / Rune Full Helm /
B: Karil's Body / Black D'hide Top / Proselyte Body / Rune Platebody / Initiate Body
L: Black D'hide Legs / Proselyte Legs / Rune Legs / Initiate /
G: Barrows gloves / Rune Gloves / Adamant Gloves / Black Vambraces /
B: Dragon Boots / Rune Boots / Climbing Boots / /
S: DragonFire Shield / AntiFire Shield / / /
MW: Whip / Dragon Scimitar / Dragon Mace / Dragon Battleaxe /
W2: Dragon Dagger (p++) / Dragon Mace / Dragon Halberd* / Dragon Battleaxe /
R: Ring of Life / Beserker Ring / Ring of Duelling / /
N: Amulet of Fury / Amulet of Strength / Amulet of Glory / /
C: (Trimmed) Skill Cape / Obsidian Cape / Ava's Accumulator / Any Other Cape /
* Whilst using a Dragon Halberd, your DragonFire Shield will UN-EQUIP. Make sure you use your specials (It will double hit the KBD) and re-equip the shield as fast as possible! You must make sure you also put mage prayer on whilst you are using the dragon halberd; this will slightly combat the fire breath if you get hit. Also, make sure your HP is above 60 at all times whilst using a dragon halberd.
Tips
- If you are on a slayer task, you can wear a black mask! The extra damage will mean your entire group takes less damage.
- As a meléer, you will be the common member of the group as only one or two people range. If Loot Share is not activated, you will frequently be beaten to the drop because of other meléers unleashing special attacks from their weapon onto the King Black Dragon.
- Pot up outside the lair with your super set and super anti-poison and enter with mage prayer active, once you have killed it once, you can remove prayer and never use it again because of the armor you will be using. Pot up every time one of your combat levels drops back to what it was originally.
- If the KBD spawns in a different place to normal, get out from underneath as soon as you can to make the KBD stay where it should be so everyone does not go out of place.
- Unleash specials when you have 50% (or 60% if you are using a dragon halberd) energy in your bar not 100%. You will hit just as hard as if you were using 4 specials because you frequently hit 0-0 using specials, plus, you use it more often in effect.
- If you want, use chivalry, piety, or a group of prayers to help you if you are running out of food and want to use up your remaining prayer potions. If you wish to use it constantly, bring at least 3 prayer potions, maybe 4.

Best to Worst:
Code:
G: Barrows gloves / Rune Gloves / Adamant Gloves / Black Vambraces /
B: Dragon Boots / Rune Boots / Climbing Boots / /
S: None** / / / /
W2: None* / / / /
R: Ring of Life / Beserker Ring / Ring of Duelling / /
N: Amulet of Fury / Amulet of Strength / Amulet of Glory / /
C: (Trimmed) Skill Cape / Obsidian Cape / Ava's Accumulator / Any Other Cape /
* You might want to bring along a dragon halberd or another dragon item to use special attacks on the King Black Dragon if your weapon has no special.
** You will have a Two-Handed Weapon.
As you can see I have not included the Weapon, Helmet, Body or Leg slots. This is because you now have a massive choice on what to pick!
The Godsword set allows you to mix and match what you can afford, the ones at the top are the best, going down to the worst at the bottom.
The Barrows set, however, you must use all of the ones on a row, so you cannot mix and match, although, you should be able to have worked out why for yourselves.
Godsword Set
Code:
Sara Godsword / Karil's Top / Black D'hide Legs / Helm of Neitiznot
Armadyl Godsword / Black D'hide Top / Proselyte Legs / Beserker Helm
Bandos Godsword / Proselyte Body / Initiate Legs / Proselyte Helm
Zamorak Godsword / Initiate Body / Granite Legs / Initiate Helm
Dragon Halberd / Granite Body / Dragon Platelegs / Dragon Full Helm
Dragon Two-Hand / Rune Platebody / Rune Platelegs / Rune Full Helm
Barrows Sets
Code:
Dharok's Axe / Dharok's Body / Dharok's Legs / Dharok's Helm
Verac's Flail / Verac's Brassard / Verac's Legs / Verac's Helm
Guthan's Spear / Guthan's Body / Guthan's Legs / Guthan's Helm
Verac's Flail / Verac's Brassard / Verac's Legs / Verac's Helm
Guthan's Spear / Guthan's Body / Guthan's Legs / Guthan's Helm
Godsword Special Attacks
- Armadyl Godsword ~ The Judgment ~ Inflicts 25% more damage
Bandos Godsword ~ Warstrike ~ Attack does 10% more damage and drains your opponent's combat statistics by the amount of damage inflicted. Statistics are drained in the following order: Defence, Strength, Prayer, Attack, Magic, Ranged.
Saradomin Godsword ~ Healing Blade ~ Inflicts normal damage, but restores half of the damage to your Hitpoints and a quarter to your Prayer. You will receive a minimum of 10 Hitpoints and 5 Prayer.
Zamorak Godsword ~ Ice Cleave ~ Freezes your opponent for 20 seconds.
- This is EXTREMELY dangerous. It is best to have knowledge of the King Black Dragon before you attempt this.
- As you have a Two-Handed Weapon, you have no AntiFire/DragonFire shield! This means that you MUST have mage prayer on the whole time the King Black Dragon is spawned.
- Pot up whenever your attack, strength OR defense levels return to it's permanent level.
- Always watch your health very carefully, you can get hit big because you have no AntiFire/DragonFire shield.
- Regularly check your Prayer Points, it drops very quickly if you do not pay attention, this means no prayer, no shield; you can get hit up to 65.
- If you are on a slayer task, you can wear a black mask! The extra damage will mean your entire group takes less damage.
- This is the best way to kill the King Black Dragon solo. But remember, you only have 2-5 minutes to return to your gravestone if you do attempt this!
Best to Worst:
Code:
H: Archer Helm / Robin Hood Hat / God Coif / Coif / Skill Cape Hood
B: Karil's Top / Black D'hide Body / Prosylete Body / Initiate Body / Red D'hide Body
L: Black D'hide Legs / Prosylete Legs / Dragon Legs / Initiate Legs / Red D'hide Legs
G: Barrows Gloves / Rune Gloves / Black Vambraces / /
B: Ranger Boots / Snakeskin Boots / Dragon Boots / Rune Boots /
S: DragonFire Shield / AntiFire Shield / / /
MW: Rune Crossbow ** / Bone Crossbow º / Rune Crossbow ºº / /
W2: None* / / / /
R: Archer's Ring / Ring of Life / Ring of Wealth / /
N: God Stole / Amulet of Fury / Amulet of Accuracy / Amulet of Glory /
C: Ava's Accumulator / (Trimmed) Skill Cape / Obsidian Cape / Any other Cape /
* You will not need a second weapon as both the bone crossbow and rune crossbow (with enchanted bolts) will have special attacks.
** With (adamant) ruby bolts (e). These will hit like normal adamant bolts but the special will sometimes hit, causing 20% of the monsters hp to hit. On the King Black Dragon this can be up to 48.
º Bone Bolts. Special reduces defense of the monster.
ºº With any un-enchanted bolts. Try to get them over Mithril if you can.
Tips
- As a ranger, you would expect to try and sit as far from the King Black Dragon as possible, but you want to get into melée range. This is so it uses more melée attacks and less breaths so you use less potions. This is because it's melee attack is weaker then it's magic attack.
- Pot up outside the lair with your ranger potion and super anti poison and enter with mage prayer active, once you have killed it once, you can remove prayer and never use it again because of the armor you will be using. Pot up every time one of your combat levels drops back to what it was originally.
- If the KBD spawns in a different place to normal and you are under it, get out from underneath as soon as you can to make the KBD stay where it should be so everyone does not go out of place.
- If you have a bone crossbow, the special attack uses 80% of the bar. Only use it straight after the King Black Dragon has spawned because of the defense lowering ability.
- If you want, use hawk eye to help you if you are running out of food and want to use up your remaining prayer potions. If you wish to use it constantly, bring at least 3 prayer potions, maybe 4.
- If you are using Ruby Bolts (e), you will notice you have no special bar. This will automatically hit at a random time, dealing 20% of the hitpoints of the monster.

Best to Worst:
Code:
H: Archer Helm / Robin Hood Hat / God Coif / Coif / Skill Cape Hood
B: Karil's Top / Black D'hide Body / Prosylete Body / Initiate Body / Red D'hide Body
L: Black D'hide Legs / Prosylete Legs / Dragon Legs / Initiate Legs / Red D'hide Legs
G: Barrows Gloves / Rune Gloves / Black Vambraces / /
B: Ranger Boots / Snakeskin Boots / Dragon Boots / Rune Boots /
S: None** / / / /
MW: Dark Bow / Crystal Bow / Seercull Bow / Magic Shortbow /
W2: None* / / / /
R: Archer's Ring / Ring of Life / Ring of Wealth / /
N: God Stole / Amulet of Fury / Amulet of Accuracy / Amulet of Glory /
C: Ava's Accumulator / (Trimmed) Skill Cape / Obsidian Cape / Any other Cape /
* Sometimes, rangers using bows without a special will bring along a dragon halberd or another dragon item to use special attacks on the King Black Dragon (More in Tips).
** You will have a Two-Handed Bow.
Tips
- As you have a Two-Handed Bow, you have no AntiFire/DragonFire shield! This means that you MUST have mage prayer on the whole time the King Black Dragon is spawned.
- If you can, stay within melée range. Seems odd does it not? The key to this is, as you have mage prayer on, it will want to melée you, but, you have good defense against his melée armour, so you get hit less, because his mage attack is stronger even with your huge mage defense!
- Keep your range level at least 5 above your permanent level at all times.
- Always watch your health very carefully, you can get hit big because you have no AntiFire/DragonFire shield.
- Regularly check your Prayer Points, it drops very quickly if you do not pay attention, this means no prayer, no shield; you can get hit up to 65.
This is generally done in three different ways, although, there is a slightly easier one for those going alone to join halfway through a trip.
Fixed Wilderness Teleports - The easiest way to go, sometimes takes a while to get to the Level 44 one though. If you get to the level 50 one, teleport fast, revenants and the Chaos Elemental have parties here. You can lure the revenant into and out of teleports too so you can escape. If you get split from the group, just keep trying to get to level 44.
Walking - Very easy. Very likely to meet revenants however, this is the traditional SoDB route.
Ice Plateau Group Lunar Teleport - If one person is on Lunars they can use this. Sometimes not everyone will have Accept Aid On, this should be told though. Not much chance of meeting a revenant.
Ardougne Teleport Lever - Pass Chaos Elemental. Pass 3 revenant paths. It screams 'Kill Me', although it is fast.


Generally, you meet at Edgeville, go to the monastery, get prayer points, and go to the ditch.
Make sure your group leader has specified a back-up world (make sure it has Loot Share if you are using it) in case someone catches sight of Revenant Ghosts or there is a Revenant Ghost.
Tell everyone to turn Loot Share on at this time if you are using it and make sure everyone is now talking solely in Clan Chat.
Once ready, follow your group leader into the wilderness. Some rules on 'If A Revenant Ghost Turns Up' are after the 'How To Get There' section of this guide. SoDB's main method of traveling is by walking directly. Please refer to 'How To Get There' for more information.
On arrival of the gate, just before the greater demons behind the gate, your leader will tell you to use your potions. If you are a ranger, these would be Range Potion and Super Anti Poison. If you are a meléer, these would be your Super Set and Super Anti Poison. You should then proceed to put Mage Prayer on and enter.
You will go down a ladder within the Greater Demons into a small room, surrounded by walls and lava and poison spiders. If you did not drink any Anti-Poison, you will be poisoned, if you did drink some, good. There is a small lever which you need to pull - this takes you straight to the KBD lair.

You should have mage prayer activated and have used the necessary potions, if you have not, do so now. Kill the King Black Dragon as quickly as possible, if you are recording loot, record it.
Get into a position around the King Black Dragon, as shown. Use landmarks (Such as the Sapphire spawn and the Gold Ring spawn) to find out where to stand.

You are now at the King Black Dragon with your group and should be killing it with ease!
Part 5 - Other
Part 5.1 - If a Revenant Ghost turns up!
Part 5.1.1 - Catching Sight of a Revenant Ghost
Tell your team to put range prayer on, keep walking but just avoid it.
Part 5.1.2 - If You Get Attacked By a Revenant Ghost
Turn on RANGE prayer instantly.
Lure them behind a rock and just run away. They are not very smart.
If you have been Tele-Blocked, continue as above but stay with the poison spiders until it wears off.
Part 5.1.3 - If a Team Mate Gets Attacked By a Revenant Ghost
Tell them to turn on RANGE prayer if they already haven't. They freeze with their range attacks.
Tell the entire team to turn run ON and get to the KBD lair as soon as you can.
Part 5.2 - Something missing?
If there is anything missing to go towards this guide, all you have to do is simply message me with what is missing, and what needs to go into it. I will add it into the appropriate section of the guide (or even make a new one!) and add you into the credits.
Part 6 - FAQ
Q: What would be the best choice of armor if I'm new to KBD?
A: The best thing to start off with is a one-handed weapon, as you can use the dragon fire shield. It is the safest way, and the least complicated. Alternatively, if you are a ranger, you can start with a 1-handed bow. It is also very safe. Ranging with a 2-handed bow is not hard, but mistakes can be costly. Meleeing with a 2-handed weapon should only be done if you are very experienced, and if your team knows what to do in that situation.
Q: What level should I be before I go to the KBD?
A: Preferably, you should be level 60+ with a good team. You can really go at any level as long you have any gear listed, have over 30 hitpoints, and have started Dragon Slayer.
Q: How many people is too many to take?
A: 1 more then the server can hold!
Q: How come the King Black Dragon isn't the toughest dragon, if he is the king?
A: He is the King of Black Dragons. If you have a point against that, something exploded somewhere near the Barbarian Outpost so now there is a whirlpool and some Mithril Dragons were a part of this explosion and they are very strong indeed because they got created from a massive explosion. I like the word explosion...
Q: What level should I be before I start soloing?
A: Ok, if you want to solo melée, you will need to be 100+ at the bare minimum with buckets of experience. If you are a ranger, you will need at least 80 range and 75 defence and to know how the KBD 'works'. But remember, this guide does not give you tips for soloing, so please do not use it if you plan to solo!
Q: How is it possible that this guide is so awesome?!?!
A: Because I am awesome?!?!
Part 7 - Credits
Writer: Ca2theone
Quality assurance: Fredz, Superson & Ca2theone
Small extras:
Thanks to everyone who has read this guide and I hope you like it!


